
Maybe you’ve built some queries in a test environment, and now it’s time to start using them for real. The obvious question arises: How to change source data location in Power Query?
Or, maybe you’ve linked to a workbook/CSV file that updates every month, so you need to update the data source. Or, perhaps you’re a consultant who needs to pass a Power Query based workbook to a client, and you want to provide an easy method to configure it to their environment.
These are all scenarios where we need to change the source data in Power Query. This post supplies methods to help you achieve this.
As with most things in Excel, there are multiple ways to do this. While each option provides the same result, each fits your workflow differently. Make sure you read to the end to see all the possibilities.
Without further ado, let’s get started.
Table of Contents
Watch the video

Edit the Source step in the applied steps window [#1]
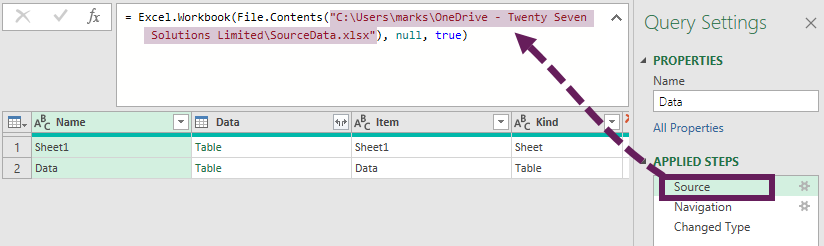
The first step in most queries identifies the source data. Technically, it doesn’t have to be, and it doesn’t have to be called Source either. However, in most cases, Source will be first, so we will work on this assumption.
Click on the gear icon next to the Source step within the Applied Steps box.
The source dialog box opens. Click Browse to navigate to the new file location, then click OK.
The query now points to the new source data location.
In this example, an Excel Workbook is the source. Depending on the source type, the dialog box appearance will differ, but the principles will be the same.
Change the M code in the formula bar [#2]
The source file’s location is included in the M code for the step. For example, the screenshot below shows the first step in the query with the M code displayed in the Formula Bar.
If the Formula Bar is not visible, click View > Formula Bar in the Power Query menu.
We can edit the code directly in the Formula Bar. We just update the text string with the new file location or other information as required.
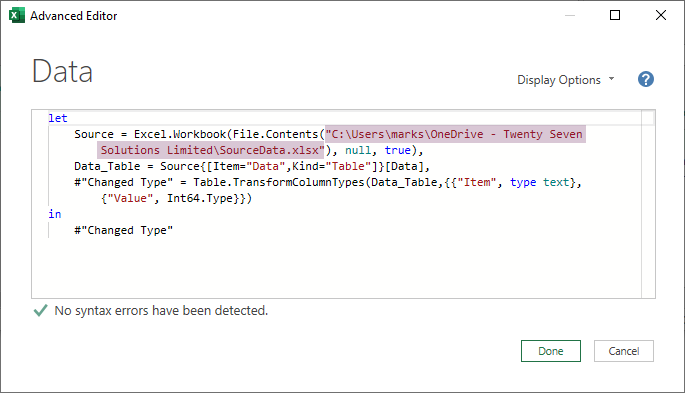
Change the M code in the advanced editor [#3]
This method is a similar solution to Method #2.
We edit the code in the Advanced Editor, click Home > Advanced Editor (or View > Advanced Editor).
Edit the code in the Advanced Editor dialog box, then click Done.
Use the Data Source settings [#4]
When multiple queries come from the same source, there is a better way; using the Data Source settings. This method repoints all queries using that source to the new source.
In the Power Query editor, click Home > Data Source settings

In the Data Source settings dialog box, select the source we want to change, then click the Change Source... button.
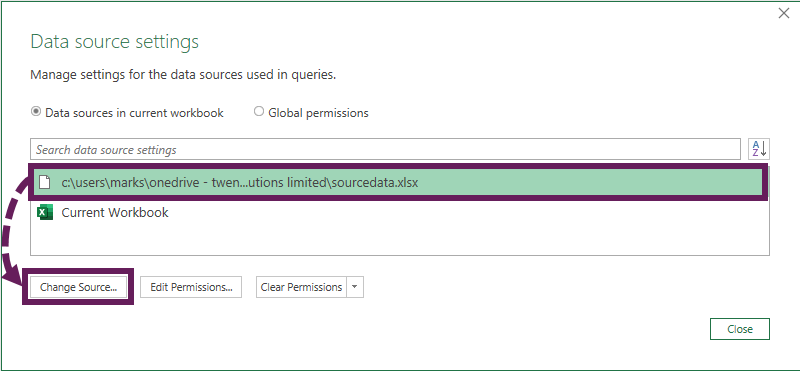
This brings up the same window as clicking the gear icon in the applied steps window. After changing the source path, we click OK to change all queries using that source.
Note: The Data Source settings are available in other locations in Excel and Power Query, but I find this the easiest to remember.
Using worksheet cell parameters [#5]
If you know source data locations will change, a good option is to create parameters. Check out this post to find out more about parameters in Power Query.
A cell on the worksheet can contain a text string with the location of the data source. Repointing the query is as easy as changing the text string in the cell. However, the challenge is finding where that cell is.
Due to the Formula.Firewall error, it is likely the Source will not be the first step (that is not guaranteed though). In the Applied Steps window, look for code that references [Name=”?????”]. This tells us that there is a Named Range or Table on the worksheet called FilePath containing the data source location.
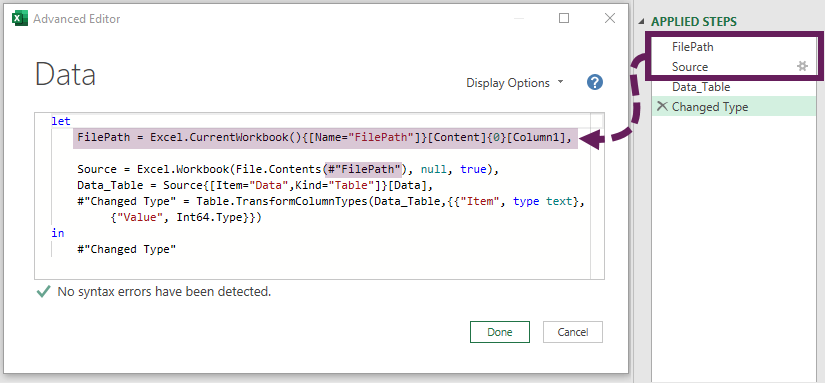
Back in Excel, we find the Named Range or Table in the Name box. Selecting the names takes us to the cell we need to change.

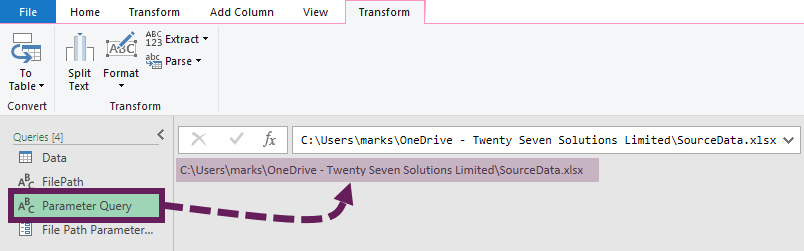
Using queries as parameters [#6]
If the code references a query with a text data type, the data source is likely to be the result of another query (see the example screenshot below)

To update the source, we edit the referenced query.
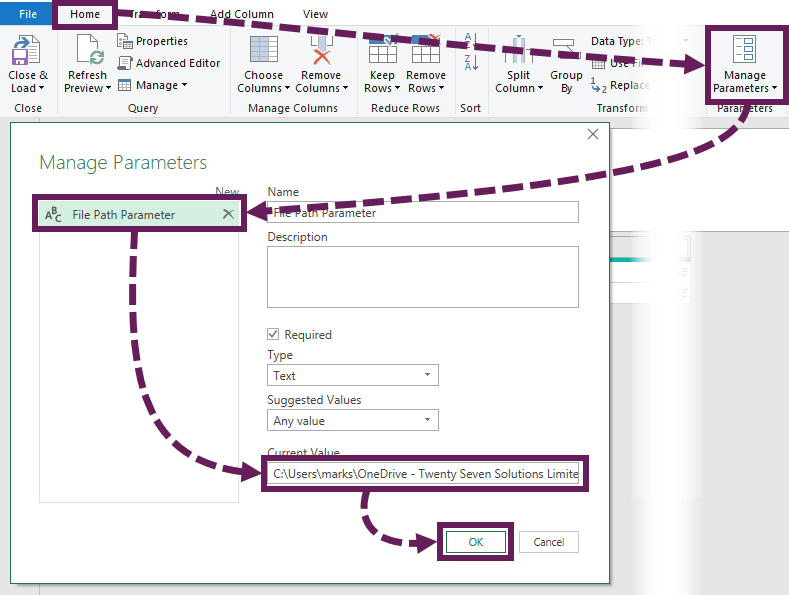
Using Power Query parameters [#7]
Finally, the data source can be referenced inside an official Power Query parameter.

To change the data source for this parameter, click Home > Manage Parameters.
Make changes to reference the new source data inside the Manage Parameters dialog box, then click OK.
These parameters are used for special purposes inside Power Query. Find out more about this here.
Conclusion
Power Query is a very flexible tool that provides many options for handling data sources. In this post, we have seen 7 approaches to change data source location. However, even this list is not exhaustive; other methods, such as functions or manual data entry exist. But I believe these are the scenarios we are most likely to face.
Read more posts in this series
- Introduction to Power Query
- Get data into Power Query – 5 common data sources
- DataRefresh Power Query in Excel: 4 ways & advanced options
- Use the Power Query editor to update queries
- Get to know Power Query Close & Load options
- Power Query Parameters: 3 methods
- Common Power Query transformations (50+ powerful transformations explained)
- Power Query Append: Quickly combine many queries into 1
- Get data from folder in Power Query: combine files quickly
- List files in a folder & subfolders with Power Query
- How to get data from the Current Workbook with Power Query
- How to unpivot in Excel using Power Query (3 ways)
- Power Query: Lookup value in another table with merge
- How to change source data location in Power Query (7 ways)
- Power Query formulas (how to use them and pitfalls to avoid)
- Power Query If statement: nested ifs & multiple conditions
- How to use Power Query Group By to summarize data
- How to use Power Query Custom Functions
- Power Query – Common Errors & How to Fix Them
- Power Query – Tips and Tricks
Discover how you can automate your work with our Excel courses and tools.
The Excel Academy

Make working late a thing of the past.
The Excel Academy is Excel training for professionals who want to save time.