
This post looks at how to use the Power Query editor to edit existing queries in Excel. We’ve seen some of this in a previous post of this Power Query series, but now we’ll go a lot deeper.
Table of Contents
Download the example file: Join the free Insiders Program and gain access to the example file used for this post.
File name: 0091 Edit Queries.xlsx
All the examples in this post use 0091 Example 7 – Edit Queries.xlsx. So, open up the file, and let’s get going.
Open the Power Query editor
As with many features of Power Query, there are multiple ways to access the same action. Opening the Power Query editor to edit an existing query is no different; there are loads of ways to do it. I will briefly cover the most common below, though we only need to know one or two.
Queries & Connections
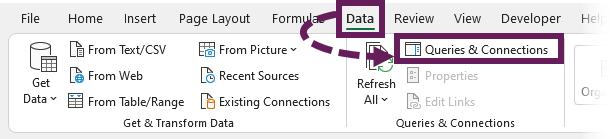
In my opinion, the easiest place to open the Power Query editor is from the Queries and Connections pane. Click Data > Queries & Connections from the ribbon.
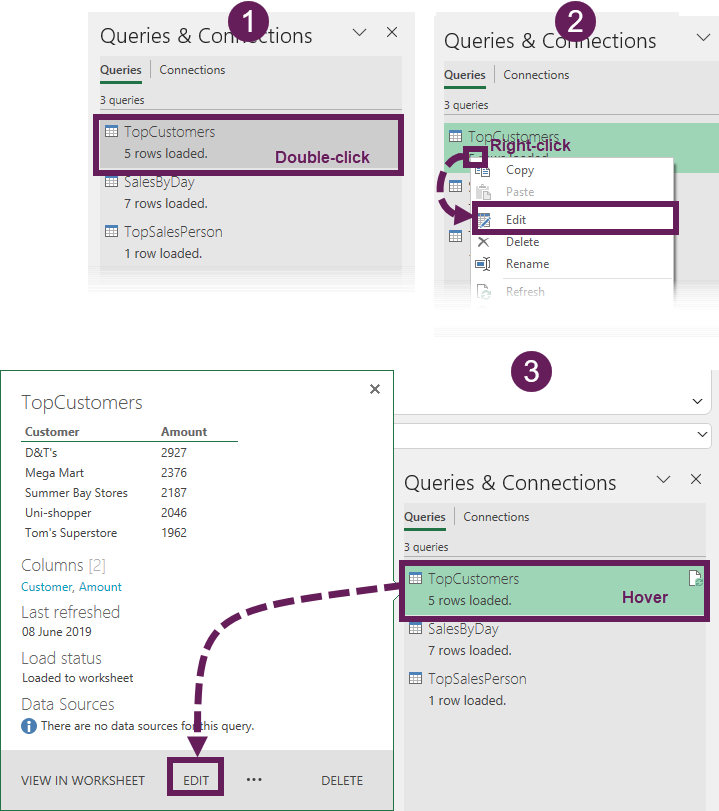
The Queries & Connections pane opens. Even within here are three ways to open the Power Query editor:
- Double-click on the name of a query.
- Right-click on the query and select edit.
- Hover over a query name (don’t click, just hover), Excel displays the query summary. Click the Edit option at the bottom.
All 3 of these options will get you into the Power Query editor.
Launch Power Query editor
We can get directly into the Power Query editor from the ribbon; we don’t need to select any specific query. Click Data > Get Data > Launch Power Query Editor….

Query ribbon
Clicking on a Table containing a query (green striped format by default) will reveal the Query ribbon. Then, Click Query > Edit.

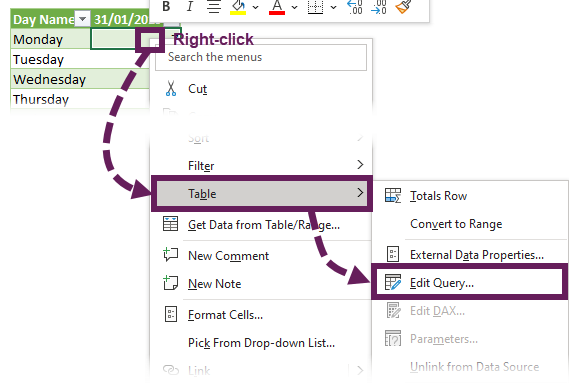
Also, right-clicking on a Table and selecting Table > Edit Query can get to the query editor.
Inside the Power Query editor
Once the Power Query editor opens, we can edit any query in the workbook. If the queries pane on the left is closed, click on the > arrow to expand the list. Once the queries pane is open, click on any individual query to activate it for viewing or editing.
Edit transformations
Now that we’ve selected a query, we are ready to start editing. For the remainder of this post, we are working with the example file. We will to modify the existing from that file transformations.
Use one of the methods above for opening Power Query, then we can get started editing transformations.
Basic settings
The gear icon exists next to many of the steps within the applied steps list. Clicking the icon reveals the options window for that specific step.
Using the Example file, select the Top Customers query, then click on the gear icon next to the Keep First Rows step. The Keep Top Rows window opens. The query is currently set to show 5 customers, change this to 3, and click OK.
Woop, Woop! We have just edited the query.
Adding steps
The applied steps box is also used to insert, move and delete steps. Let’s take a look at that in this section.
Select the TopCustomers query and click on the step called Calculated End of Month. The data preview shows all the transformation steps up to the end of the current selection.
Now let’s insert a new step. Click on the filter drop-down of the Date column and select only 31 January 2019 (depending on your local date format it may appear slightly different for you). Then, click OK.
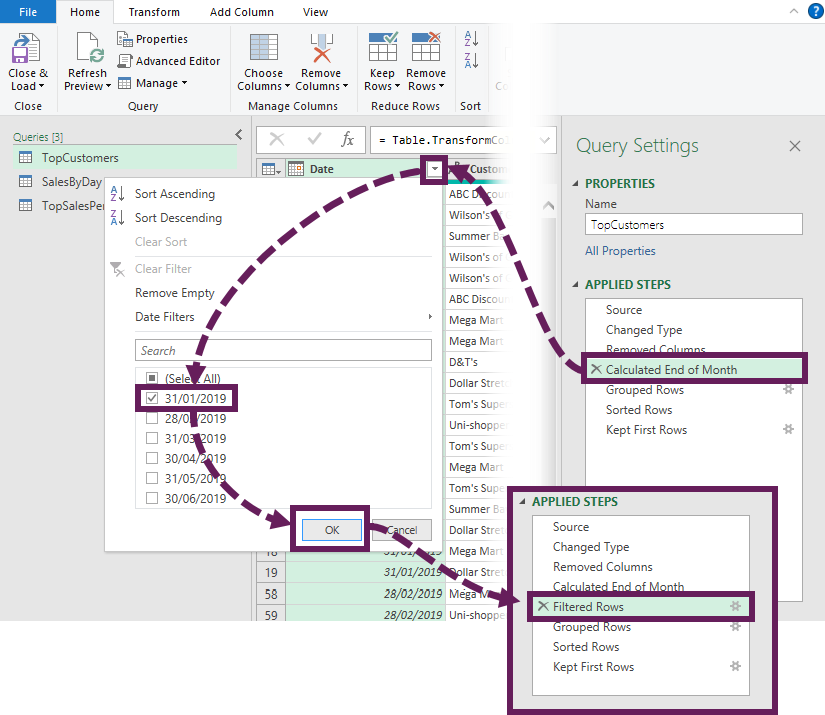
A new step appears below the previously selected step.
Clicking through the remaining steps to view the transformations, there should be no issues with this specific example. However, this will not always be the case. When changing steps in the middle of a query, it can cause errors later on, as the changes we make may not flow through into the subsequent steps.
Click on the Removed Columns step. Change the header of the Date column to Month End.
A warning message is displayed. Not all warning messages are bad; you get to choose if it is relevant to your scenario or not. We are trying to force an error in this example, so please click Insert.
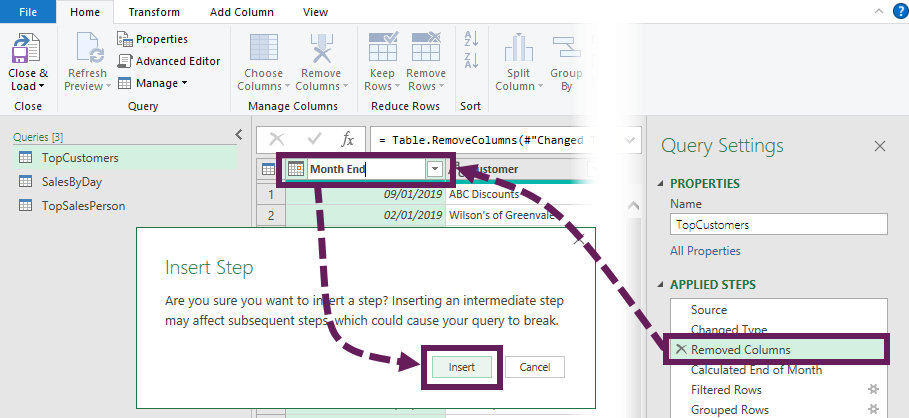
The new step is added.
Next, click on the Calculated End of Month step. Oh dear… there is an error. This is because the Calculated End of Month step is trying to find a column called Date, which is no longer exists (we renamed it to Month End Date). If you still have the Formula Bar open, you can see the reference to the Date column, which is no longer available (see the screenshot below).
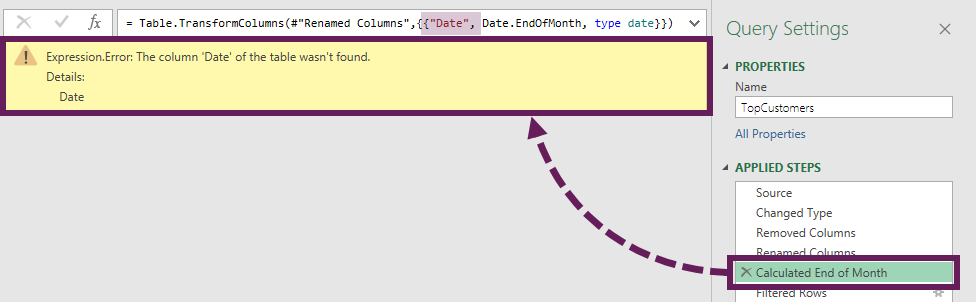
Now we have some choices. Do we need to insert that step at this point? Should we delete and re-perform the affected steps? Should we edit the M code of the remaining steps to replicate the change? Only you can make this decision.
Once you’ve been in this situation a few times, you’ll soon work out the best options. I recommend only deleting the remaining steps and re-performing the transformations as a last resort. With some practice and perseverance, you’ll learn how to fix the most common errors by using the formula bar or inserting additional steps.
Deleting steps
The example above illustrates the potential issues from editing existing steps; let’s delete the Renamed Columns step that we added. Click on the X next to the step to remove it.

Deleting is easy, but be aware that this can cause errors too.
Moving steps
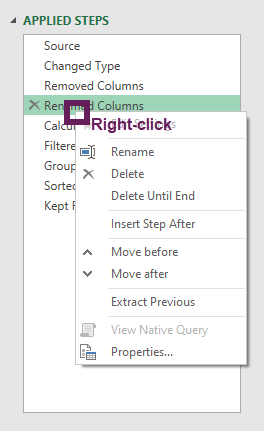
To move a step up or down, there are again more user-interface options:
- Right-click on the step and click Move Up or Move Down from the menu (see screenshot below)
- Click on a single step, hold the mouse button down and drag the step to a new location. This is my preferred option.
As you can imagine, moving steps has the same issues as inserting steps; it can result in errors.
Where did my step go?
Power Query is smart; it groups similar actions together where it can.
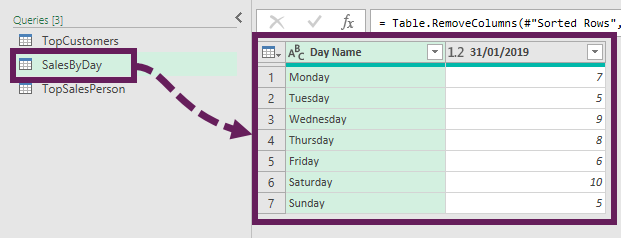
Select the SalesByDay query and ensure you have selected the last step, which is Removed Columns1. Now, let us change the headers of each column:
- Change Day Name to Day – a new step is added.
- Change 31/01/2019 (or your local date equivalent) to Number of Sales – a new step is not added.
Look at the applied steps again… there is only one step added. Where did the second step go?
Take a closer look at the Formula Bar; you will see that both the steps have been combined into one.
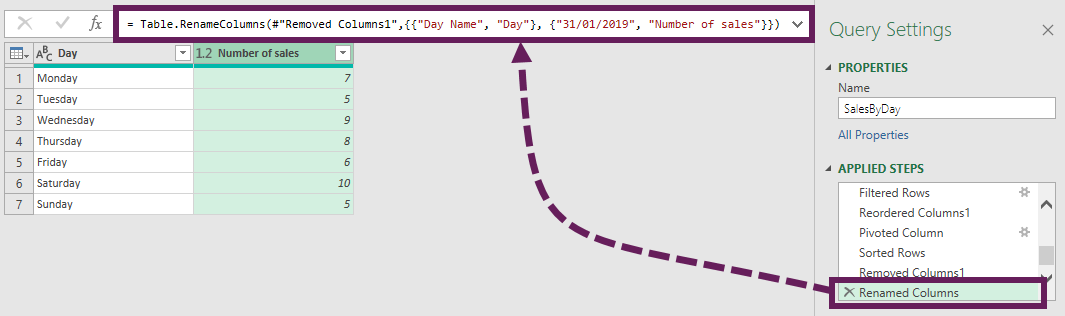
This occurs when like-for-like steps are performed one after another. It certainly helps to keep the applied steps significantly smaller than they might be otherwise.
M code: Formula bar & Advanced Editor
OK, things are about to get serious – we are going to edit the M code! We can edit the code directly in two ways:
- Formula Bar
- Advanced Editor.
I prefer the Formula Bar method. So, let’s start there.
Formula bar
If the formula bar is not visible, we can turn it on by clicking View > Formula Bar from the ribbon.
Select the SalesByDay query and click on the Sorted Rows step.
The formula bar will show the following:

Even though might not be able to write M code from scratch, but that doesn’t mean we can’t edit the code with a bit of common sense. In the formula bar, change the text “Day of Week” to “Day Name”. If you look at the data preview window, the Day Name column is now sorted in ascending order.
Next, change the text which says Order.Ascending to Order.Descending. Check the preview window again, and notice the order has changed.
The final formula should look like this:

See, it’s not so difficult to edit the M code after all 😀
Advanced Editor
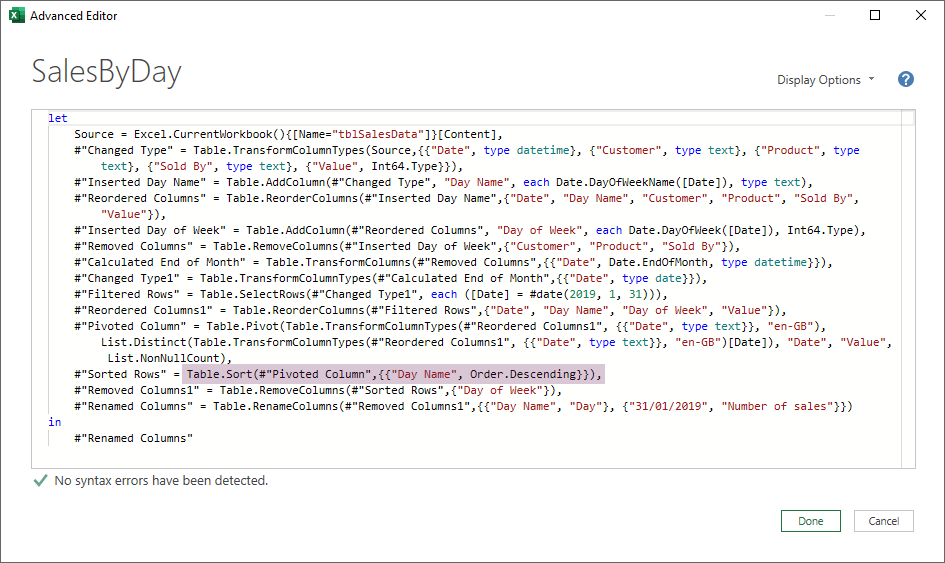
The changes we saw above can also be applied in the Advanced Editor. Click on Home > Advanced Editor.
The Advanced Editor shows every step in the query. First, we need to identify the relevant code. To do this look down the left side of the code. In the applied steps the step was called Sort Rows in the Power Query editor it is the #”Sort Rows” steps we require.
We can then make the same changes as noted in the formula bar section above (see the highlighted section below).
Close and Load into Excel
Finally, let’s close this out by clicking Close and Load. The changes we’ve made are refreshed into the Tables on the worksheet.
An important point to note is that Close & Load does not just apply to the active query, but to all queries in the workbook. So, if we’ve edited multiple queries due the session, they will all be updated simultaneously.
Close without saving changes
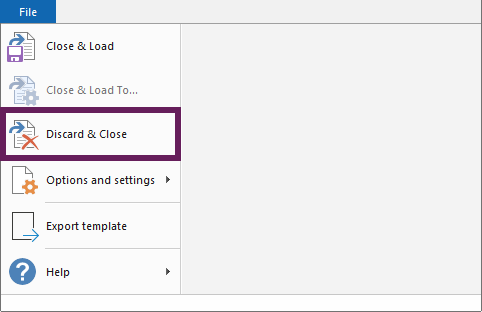
After editing a query, we may decide we don’t want to load the changes into Excel. To discard the changes, click File > Discard and Close.
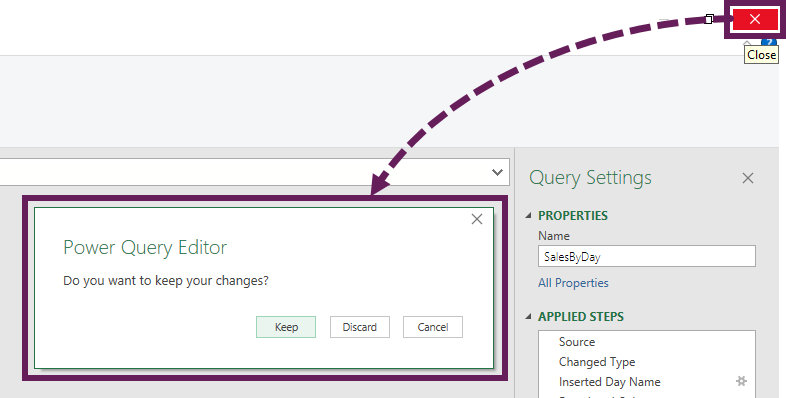
Alternatively, we can click the [X] close button (top right of the window). A confirmation box ensures we don’t lose our changes by mistake. Clicking Discard returns us back to Excel without making any changes.
Wrap-up
This post shows us how to open and edit within the Power Query editor. While we have only made basic transformations, the methods shown apply to more advanced transformations too.
Read more posts in this series
- Introduction to Power Query
- Get data into Power Query – 5 common data sources
- DataRefresh Power Query in Excel: 4 ways & advanced options
- Use the Power Query editor to update queries
- Get to know Power Query Close & Load options
- Power Query Parameters: 3 methods
- Common Power Query transformations (50+ powerful transformations explained)
- Power Query Append: Quickly combine many queries into 1
- Get data from folder in Power Query: combine files quickly
- List files in a folder & subfolders with Power Query
- How to get data from the Current Workbook with Power Query
- How to unpivot in Excel using Power Query (3 ways)
- Power Query: Lookup value in another table with merge
- How to change source data location in Power Query (7 ways)
- Power Query formulas (how to use them and pitfalls to avoid)
- Power Query If statement: nested ifs & multiple conditions
- How to use Power Query Group By to summarize data
- How to use Power Query Custom Functions
- Power Query – Common Errors & How to Fix Them
- Power Query – Tips and Tricks
Discover how you can automate your work with our Excel courses and tools.
The Excel Academy

Make working late a thing of the past.
The Excel Academy is Excel training for professionals who want to save time.