
There are many scenarios where raw data itself isn’t enough to complete a task efficiently. For example, we may need to add manual information, such as categorization, commentary, or reference numbers.
In this post, we look at this process and understand how to add manual information to a query.
Table of Contents
Download the example file: Click the button below to join the Insiders program and gain access to the example file used for this post.
File name: 0186 Add manual info to a query.zip
Watch the video
Key principles
If we want to load data from a source using Power Query and add manual information, there must be a unique reference for each row in the Table.
Since the positions of rows may change, we need a unique reference to ensure the manual information is merged with the correct row of the data.
Example
In many scenarios, the input will already include a unique reference. In this case, the process is reasonably straightforward.
Therefore, I wanted to work through an example where we need to create a unique reference as part of the process itself.
This is the example we are working through:
- CSV bank statements are saved in a folder. Power Query connects to the folder and combines the CSV files
- The combined bank statement is loaded into an Excel Table.
- We add additional information to the Table (it could be categorization, commentary, reference numbers, etc.)
- When we refresh the query to add more CSV files, the additional information must remain with the correct data row.
Since bank statements, in my experience, do not have unique reference numbers for each row, we must create the reference ourselves.
Here is a screenshot from one of the CSV files.
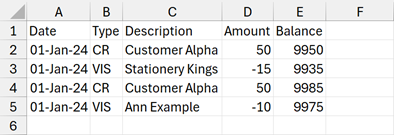
Note: In the example, the dates in the CSV files are UK dates (dd/mm/yyyy format). Even if your region uses an alternative date format, it should not prevent you from completing the example.
Process
OK, let’s build out the solution.
Step #1: Connect and Combine the CSV files
The actions for Step 1 are covered extensively in other posts (combine files in a folder using Power Query), so we won’t go into tremendous detail here.
Let’s start by getting the data from the folder.
- In Excel, click Data > Get Data > From File > From Folder
- In the navigation window, find the folder location file where the CSV files are saved, then click Open.
- Power Query displays all the files in the folder in a preview window; click Transform Data.
- At the top of the Content column, click the Combine icon (double down arrow).
- In the Combine Files dialog box, a preview of the first CSV file appears, click OK.
- Power Query adds various helper queries.
At this point, the Preview Window should look like this:
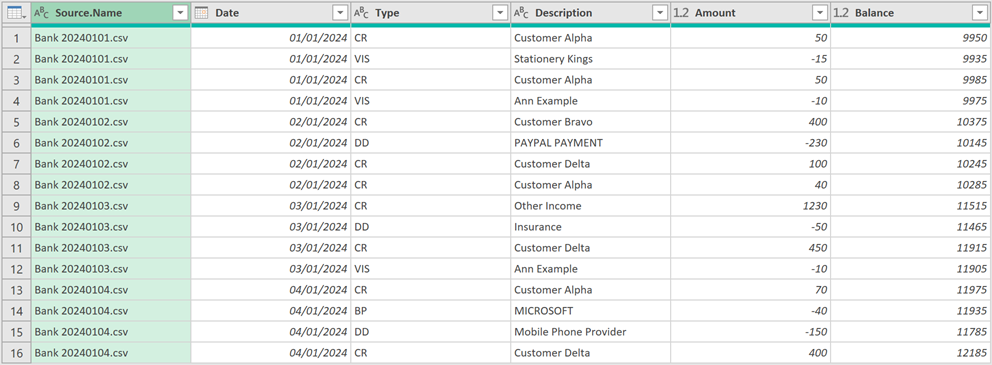
Using the Source.Name (i.e. the name of the file) and a row number from each CSV we can create a unique reference.
Select the Transform Sample File query.
From the ribbon, click Add Column > Index Column. This gives us a row number within each CSV file.

Select the query with all the files combined (Files in our example)
Select the Index column, then hold Ctrl and select the Source.Name column.
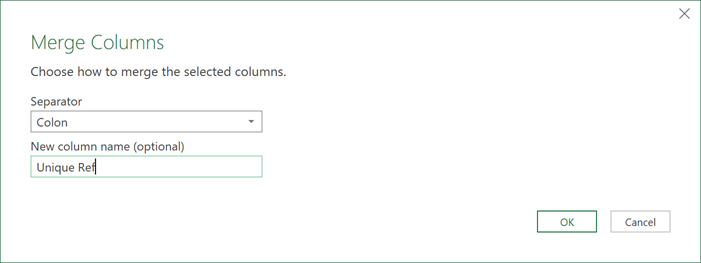
From the ribbon, click Transform > Merge Columns
In the Merge Columns dialog box, select a Separator (I’ve chosen colon) and provide a New Column Name (I’ve chosen Unique Ref). Click OK.
Now we can close and load the query as a Table in Excel by clicking Home > Close & Load (assuming you have the default setting applied).
Excel displays a Table with the bank transactions along with a Unique Ref column.
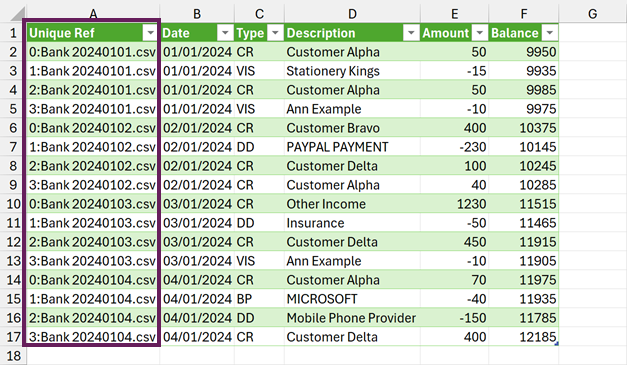
That completes Step #1.
Step #2: Add manual information column
Now let’s add the column for the manual information. In the example, I’m adding a commentary column.
In the cells to the right of the query Table add a new column header called Commentary and add a few lines of example text.
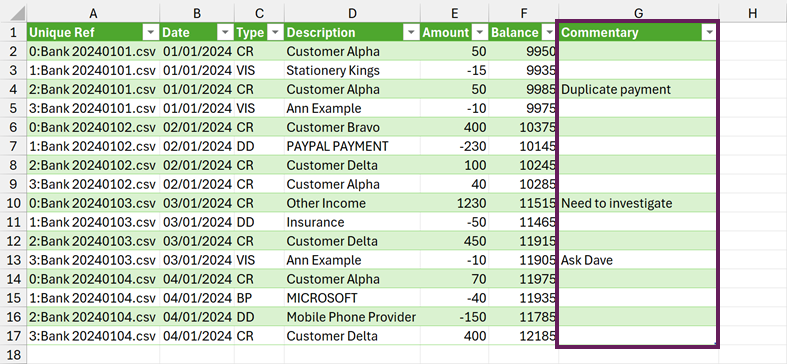
That’s it for Step #2.
Step #3: Merge the query Table back into the first query
We want to load the Table with the additional column into Power Query.
Select a cell in the Table and click Data > From Table/Range
To keep things clear. Let’s call this new query Manual Info
Next, we want to merge the Commentary column from the Manual Info query into the first query, using the Unique Ref we created earlier.
Select the first query, then from the Ribbon, click Home > Merge Queries.
In the Merge Queries dialog box enter the following:
- Top query: The first query, select the Unique Ref column
- Bottom query: Manual Info query, select the Unique Ref column
- Join Kind: Left Outer
- Click OK
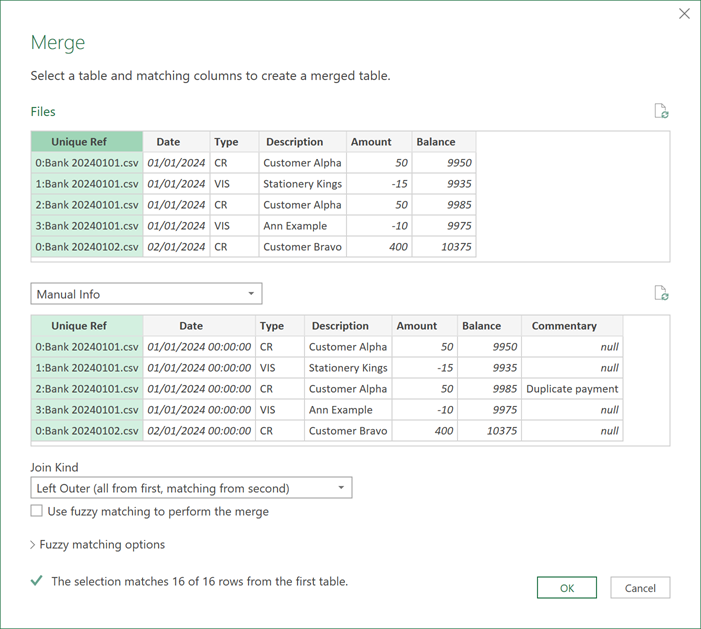
A Manual Info column is added to the first query.
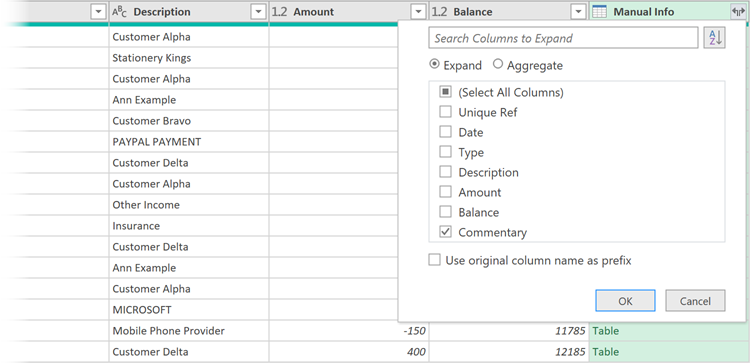
Expand the new Manual Info column, but include only the Commentary column.
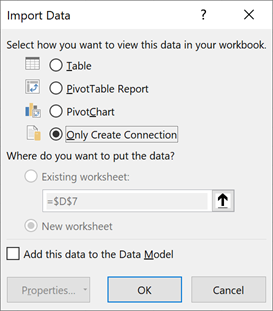
We don’t need to load the Manual Info query into Excel. So, click Home > Close & Load (drop-down) > Close & Load To…
In the Import Data dialog box, select Only Create Connection, then click OK
The Table in Excel now show Commentary and Commentary2 columns.
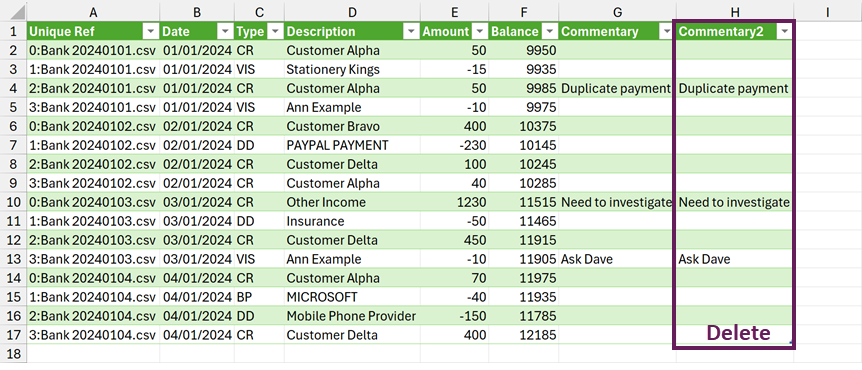
Delete the Commentary2 column, this is the manual column we created earlier, which is no longer required.
Step #4 Refreshing the query
We can now add more commentary, we can also add new files to the folder. When we click Data > Refresh All, the manual information stays with the correct data row.
Important considerations
Using this technique there are many things that might catch us out:
- If anybody changes the file name of an existing CSV file in the folder, it will result in the commentary being lost.
- If using a bank statement downloads to replace a previous statement, the row order must be identical to the original file. In Power Query, you may need to reverse the transaction order, so the oldest transactions are at the top.
- The manual information exists in a temporary state, so make sure to keep suitable backups. If somebody does something dumb, you could lose it.
Using this technique in other scenarios
There are many other scenarios where this technique could be useful:
- Writing commentary to appear in a report.
- Adding an adjustment column to correct historical information without changing the original.
- Add reference numbers to enable automatic reconciliations using the method in this post: Automate Reconciliations with Power Query.
Conclusion
In this post, we have seen how to add manual information to our data using Power Query and Tables.
The key elements for success are:
- Using, or creating a unique reference number.
- Where the process creates unique references, ensure those references do not change.
Related Posts:
- Power Query: How to Combine files based on a list
- Automate Reconciliations with Power Query (amazing time saver)
- Power Query: Lookup value in another table with merge
Discover how you can automate your work with our Excel courses and tools.
The Excel Academy

Make working late a thing of the past.
The Excel Academy is Excel training for professionals who want to save time.
I am already doing this, but it was nice to see you cover it, that means I am on the right track.
This is something all PQ users should know how to do.
Ultra useful.
Thanks Chris 😁
Thank you, Mark. Very useful.
You’re welcome 😁
Hi, excellent video covering the topic. I almost reached my goal. The issue I have is that , when refreshing the whole, some of the lines are “sliding” going from index n° 2 to n° 6 for instance hence losing track of the manually added comments.
My uniqueID is a concatenation of an index number / order number / order line. The trick is that some of the orders do have the same order number (specific process) hence the need of an index number. When refreshing, I went from 14 / CDR-23096621 / 3000
to 19 / CDR-23096621 / 3000 & lost the added comment. How could I fix that ? Many thanks in advance & have a nice day.
You’ll need to find a way of getting a unique reference. Then it will work.
This is great, thank you!
It mostly meets my project’s requirement, but the data is from a database and is already in a staging table in Power BI. I’m trying to figure out how to get the staging table’s data into Excel where the manual info can be added and do that in a dynamic way, so that as more records are added to the staging table, the linked Excel table would update with the additional rows so I can add more commentary.
Even better, I’d prefer to not have to keep a separate Excel file with the report, so ideally I’d like to do it all within Power BI. I think of using the Enter Table function, but it would have no connection with the staging table so wouldn’t update with new data.
You would have to use a manual table with a ID. As Power BI does not have any write-back capabilities on the canvas.