
Our ability to manage inputs effectively is critical to building automated processes in Excel. A common reporting scenario is to get data from the latest file. This generally occurs where each file includes the historical data; therefore, we only need the latest file.
In this post, we are exploring how to create an efficient solution for this situation.
Table of Contents
Watch the video

How to identify the latest file
The latest file might be obvious to us; we might even be the person who saved the file in the folder. But to Power Query, it’s not obvious; instead, Power Query needs to follow logic to identify the file.
Power Query provides 4 fields for us to build that logic on.
Date created – The date and time the file was created in the current file system location. Note: When copying a file from one location to another, the created date changes as the file has a new file system location.
Date modified – The date and time the file was last saved. Note: Some applications will save files even if there are no modifications; this will change the modified date.
Date accessed – The date and time the file was last accessed.
Name – The name of the file.
Now we understand these terms, it becomes clear that some fields may not be as helpful as we first thought.
- If a file has been copied, the creation date changes; therefore, the modified date can be earlier than the created date. That’s not particularly logical!
- If a file is opened and saved without any modifications, the modified date will not be the date of the last change. That’s not useful!
- A user can access a file at any time; therefore, the accessed date could change at any time. Also, not useful!
So, if we want to use the date created, modified, or accessed to determine the latest file, controlling file access is very important, as it could result in the wrong file being recognized as the latest.
The most reliable way is to use file names. We can control these and ensure it is the correct file.
If the most recent file is saved with the date and/or time within the file name (in yyyymmmdd-hhmmss format), we can sort the name column to find the most recent file.
Methods to avoid the issue
Two common ways to avoid the issue entirely are:
- Backup version numbering – Backup version numbering is where the current file always has the same name; older files have version numbers or dates. Therefore, the most recent file is always in the same file path.
- Folder for recent file – If the most recent file is the only one saved in the \recent\ folder, we can easily connect to that single file.
With these methods, we don’t need to use Power Query logic to identify the latest file; we just connect to the file or folder and know it is always the file we want.
While this is convenient, it takes a few extra manual steps to ensure the data is in the correct location with the right name.
Power Query steps
Assuming we are not using one of the methods to avoid the issue, let’s find out how to connect to the latest file.
In Excel, Click Data > Get Data > From File > From Folder.
Navigate to the folder location and click Open.
When the list of files appears, click Transform Data.
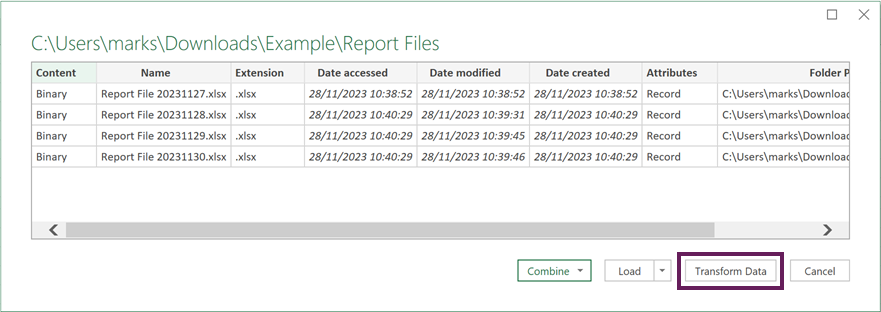
The files are now displayed in the preview window.

TIP:
If the folder contains subfolders that you want to exclude from the process, change Folder.Files in the formula bar to Folder.Contents.
Or, if using SharePoint, change SharePoint.Files to SharePoint.Contents.
Filter out any files you definitely want to exclude (e.g., files without the correct file extension).
Select the column containing the date method you are using (Date Created, Date Modified, Date Accessed, or Name), then click Home > Sort > Z-A.

As you can see in the screenshot above, the Name column is sorted in descending order.
Unfortunately, if we use the user interface for the next step, it hardcodes the file name into the M code. This breaks the query the next time we get a new file. Urrgh 😫.
But don’t worry, we can write a small piece of code ourselves.
If the file is an Excel file, click the fx icon next to the formula bar and enter the following:
= #"Sorted Rows"[Content]{0}- #”Sorted Rows”: name of the previous step.
- [Content]: name of column containing the workbook binary.
- {0}: the first row from the column (Power Query is zero-based, so 0 is the first item).
Power Query now connects to the file.

From there, you can navigate through the Excel workbook and expand the relevant data.
This method works with other file types to.
Alternative method
If you are uncomfortable writing the code above, there is an alternative option.
After sorting the files, click Home > Keep Rows > Keep Top Rows
In the Keep Top Rows dialog box, enter 1 as the number of rows, then click OK.
Click the combine files icon at the top of the Content column. This follows the process of combining all the files in the folder.
To find out more about the combine files method, check out this post
Get data from folder in Power Query: combine files quickly
Through this method, Power Query creates additional helper queries for dealing with multiple files. We only have 1 file, so this adds unnecessary complexity. Therefore, writing the code is a better approach.
Conclusion
Connecting to the latest file in a folder is a great way to streamline a process. However, we need to take care with how we handle the files.
The best method is a zero-touch method, where an automated process saves a file, and we never touch the file. This ensures the date created is reliable, and we can use that for sorting the files.
However, if we don’t have that luxury, including the date and time in the file name (either manually or automatically) also provides a reliable method.
Related posts:
- Get data from folder in Power Query: combine files quickly
- Power Query: How to Combine files based on a list
- Change the Power Query source based on a cell value
Discover how you can automate your work with our Excel courses and tools.
The Excel Academy

Make working late a thing of the past.
The Excel Academy is Excel training for professionals who want to save time.
This was extremely helpful in speeding up my daily report in power query. I’d like to ask one question. Assume the file name (using dates) was used to sort the columns and the code option was used from your examples. Instead of only getting the latest file date, what if one would want to return the last three days, for example? Change the “0” in the formula “= #”Sorted Rows”[Content]{0}” to “2”? Or would that only return the data from the third file in the sorted list?
Thank you for this training lesson!
Yes {2} would only get the 3rd file. You will need a different approach if you want to combine multiple files. It’s 100% possible, but different.