
This post looks at how to Resize an Excel sheet. It’s a common requirement for users and is especially useful when creating dashboards for different-size monitors.
Every office I have ever worked in has been an equipment battleground. It didn’t matter what the equipment was; it just had to be better than everybody else. A new keyboard, a bigger screen, even a mouse mat with a wrist rest was enough to make everyone else jealous. I was once lucky enough to be the recipient of a new, bigger screen. Wow, what a day that was! I set about creating bigger dashboards with more charts and tables, more space meant more insight, right?!? I was sure the praise would come flooding in.
But it wasn’t long until my new screen was causing me problems. Actually… it was causing my managers problems and therefore causing me problems. I had created a dashboard that fitted nicely on my new big screen, but my managers had a mix of screen sizes. Some were lucky enough to have the same as me, while others had the older smaller ones. Would the small screen managers have to scroll, or would the big screen managers have a lot of white space? That was a tough choice. It was a lose-lose situation. But, I wasn’t about to be defeated…
This post details the options for resizing and Excel worksheet, and how to make it happen automatically with a VBA macro.
Table of Contents
Manually zoom in/out
There is a zoom setting on Excel, which each user can apply themselves. This setting is available in three places:
View ribbon
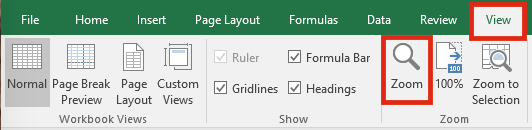
The zoom setting is available on the View ribbon. Click View > Zoom.
After clicking the Zoom button, the Zoom dialog box appears.
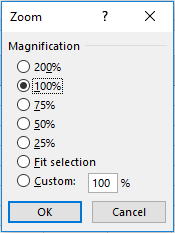
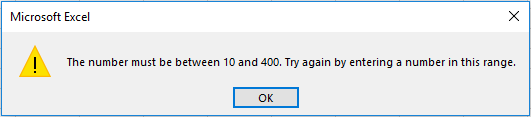
There are multiple preset options, plus a Custom option to select any size between 10% and 400%. Entering a custom size outside of this range triggers the following error message.
Status bar
The zoom setting is also available on the Status Bar.
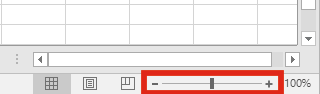
The [+] and [-] buttons move the zoom level by 10% increments. By clicking and dragging the slider it is possible to get any size between 10% and 400%.
Mouse scroll wheel
If you have a mouse with a scroll wheel (which most do), there is another option. Hold the Ctrl key while moving the scroll wheel backward and forward. The spreadsheet zooms in and out.
Whilst manually resizing the spreadsheet was an option for may scenario, it wasn’t quite the seamless user experience I was looking for.
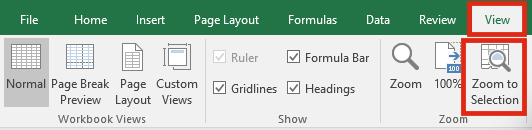
Zoom to Selection
A slightly better option for my situation was the Zoom to Selection feature. The user selects the range of cells to fill the screen, then clicks View > Zoom to Selection.
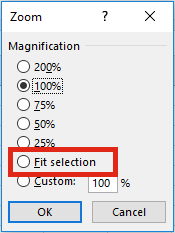
This option also exists within the Zoom dialog box, but for reasons unknown to me, it is called by a different name Fit to selection.
Now, we’re on to something. If we could automate this feature, it would be a pretty good solution.
Button click to resize Excel sheet
If you’re not a VBA-wiz, we can turn to the Macro recorder to automate the process of selecting a range and then clicking Zoom to Selection.
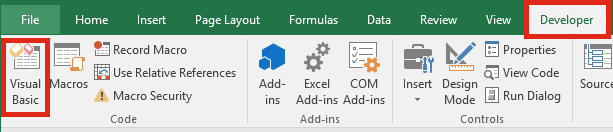
Click the Record Macro button within the Developer Tab.
Select the range of cells then click View > Zoom to Selection.
Click in Cell A1 to return the selection to a single cell.
Click the Stop Recording button from the Developer Tab.
Next, create a button using Developer > Insert > Form Control > Button (Form Control).
Assign the macro created above to that button.
Now it is possible to resize the spreadsheet to the window just by clicking the button. That’s almost an acceptable solution, but we can go one step further.
Auto-resize Excel sheet on open
Finally, we get to the good stuff. Let’s make the resizing happen automatically.
View the recorded macro code within the Visual Basic Editor by clicking Developer > Visual Basic Editor, or press Alt + F11.
The code looks something like this
Sub Macro3()
'
' Macro3 Macro
'
'
Range("A1:I15").Select
ActiveWindow.Zoom = True
Range("A1").Select
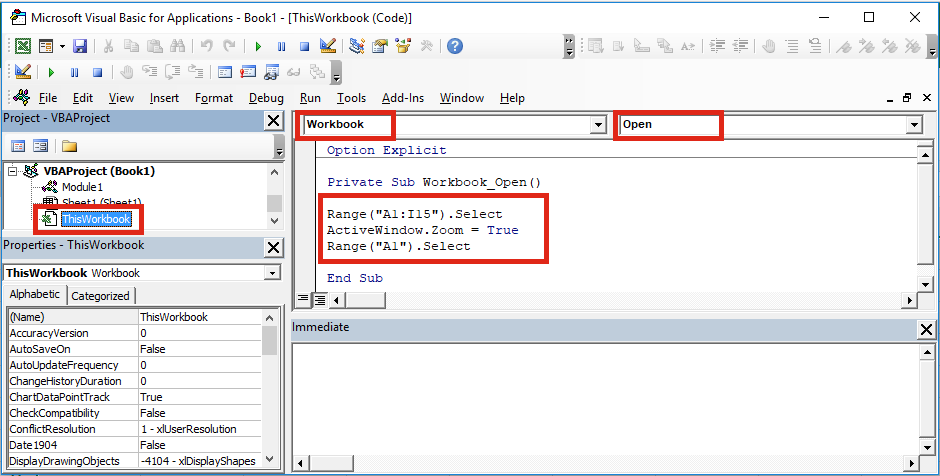
End SubCopy that code, and insert it into the Workbook Open event for the ThisWorkbook module
Delete the recorded macro and the button, as we no longer need them.
Save the file as a macro-enabled workbook, then close it.
Whenever the file opens, the Workbook Open event triggers first, which resizes the spreadsheet to fit the window.
But, we have an issue with the code, it only refers to the ActiveWindow. What if we have multiple reports, or the workbook is not saved with the report as the selected window?
Let’s update the code to make it work with any sheets that we want.
Private Sub Workbook_Open()

'Select and Resize Sheet2
Sheets("Sheet2").Select
Sheets("Sheet2").Range("A1:O23").Select
ActiveWindow.Zoom = True

'Select and Resize Sheet1
Sheets("Sheet1").Select
Sheets("Sheet1").Range("A1:I15").Select
ActiveWindow.Zoom = True
Sheets("Sheet1").Range("A1").Select

End Sub
Using the code above as an example, add as many sheets as required for the scenario.
Conclusion
Excel is a very flexible tool, it is used for more purposes than I can imagine. Therefore we often need to turn to VBA macros to fine-tune the user experience. In this post, we saw the process of how to auto-resize an Excel sheet to fit the user’s screen.
Related Posts:
- Resetting the scroll bar in Excel (5 solutions)
- VBA Code to control Excel’s Zoom settings
- VBA: Convert centimeters, inches, pixels & points
Discover how you can automate your work with our Excel courses and tools.
The Excel Academy

Make working late a thing of the past.
The Excel Academy is Excel training for professionals who want to save time.