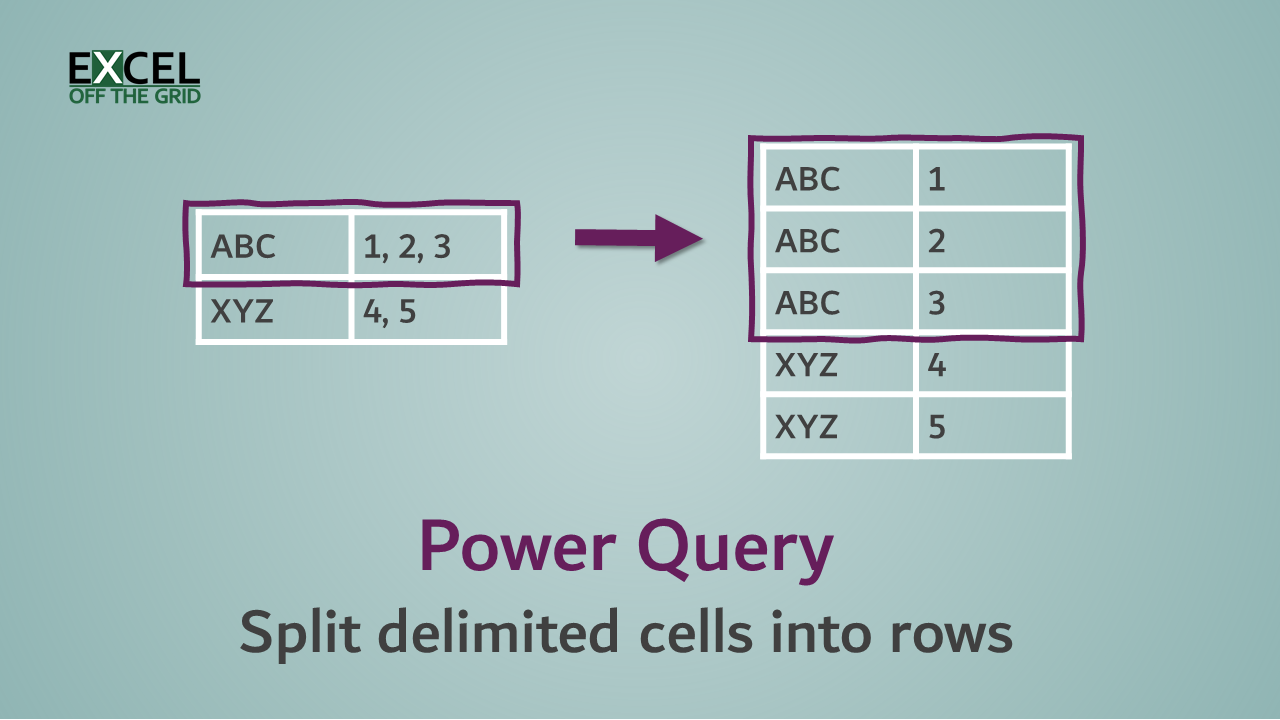
This is the first of two posts showing how to split and combine rows from/to delimited cells. In days gone by, it would take a long time for us to resolve these scenarios. But with Power Query, it’s now a quick and easy process, which can be updated with a simple refresh.
In this first part, we’ll look at how to split delimited cells into rows with Power Query.
Table of Contents
Download the example file: Join the free Insiders Program and gain access to the example file used for this post.
File name: 0023 Split delimited cells into rows.zip
Watch the video:
Scenario
Let’s start by looking at our data scenario.

The data contains a list of employees, along with any equipment that has been allocated to them by the company. Looking at Anna Watkins in row 3, we can see that she has a laptop, access card, phone, and home printer. Each piece of equipment is separated by a semi-colon and a space.
The attributes of each item are also recorded. For example, Anna Watkins’ laptop has an ID number of ID0011, and an access card with the number 231, etc. The item is separated from its attribute with a colon and as space.
While the format is useful for quickly seeing all employees, it’s not ideal if we want to know who has a specific item. For example, who has a company credit card? Or who has which phone number?
The following format is more usable from a data manipulation perspective.
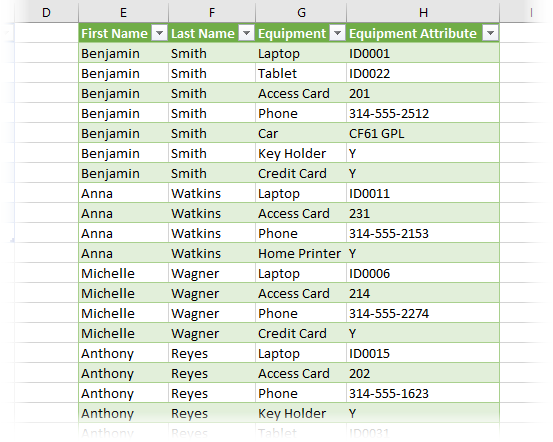
If we had this format, we could easily filter the Equipment column and identify the individuals with a company credit card, or even create an employee telephone list.
We’re going to use Power Query to quickly convert our source data into this format.
While Power Query is the best option for this type data manipulation, other methods exist for splitting cells, which you can read about here: https://exceloffthegrid.com/how-to-split-cells-in-excel/
Load data into Power Query
To start, we need to get the data in Power Query. Select any cell within the table, then click Data -> From Table / Range.

The Power Query Editor will open, showing the data from the table.
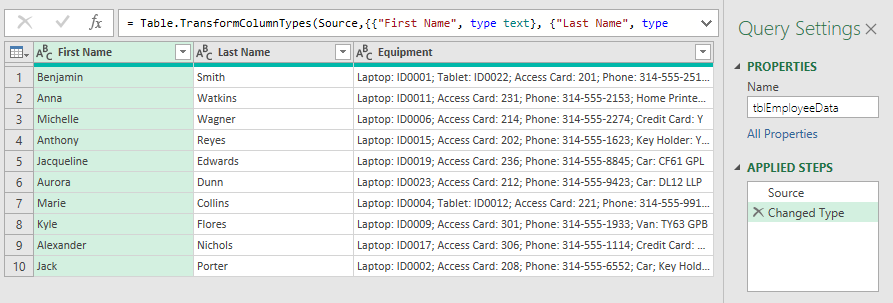
OK, we’re now ready for the magic to begin:
- We’ll split the Equipment column into rows, using the semi-colon and space to determine where to split.
- Next, we’ll split by a colon and space to create separate columns for equipment and its attribute.
Split into rows
OK, let’s split the Equipment column into rows.
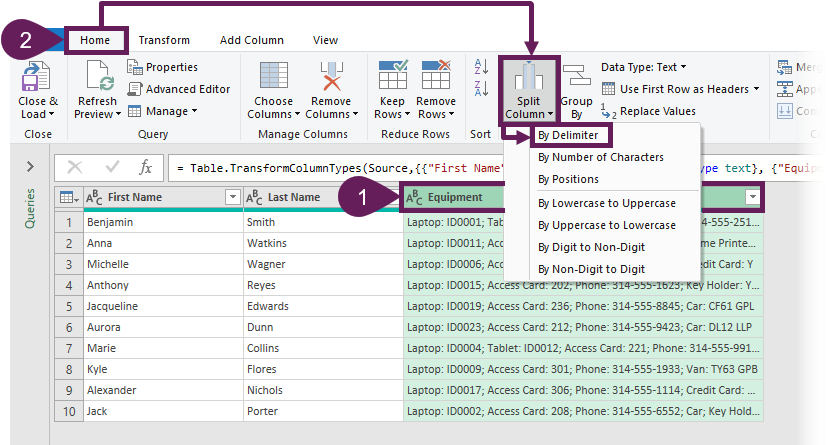
- Select the Equipment column by clicking on the column header.
- Click Home -> Split Column (drop-down) -> By Delimiter.
- In the example we’re working through, each piece of equipment is separated by a semi-colon and a space. This is not in the default delimiter list, so we need to select Custom from the drop-down, then in the box below, enter a semi-colon ( ; ) followed by a space. Choose the option to split at each occurrence of the delimiter.
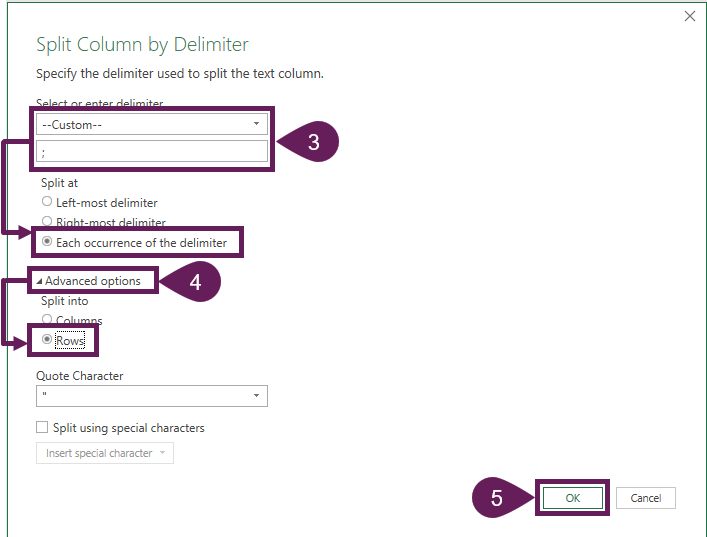
- Expand the available options by clicking Advanced options, then select the Rows.
- Click OK to execute the transformation.
The data now looks like this:
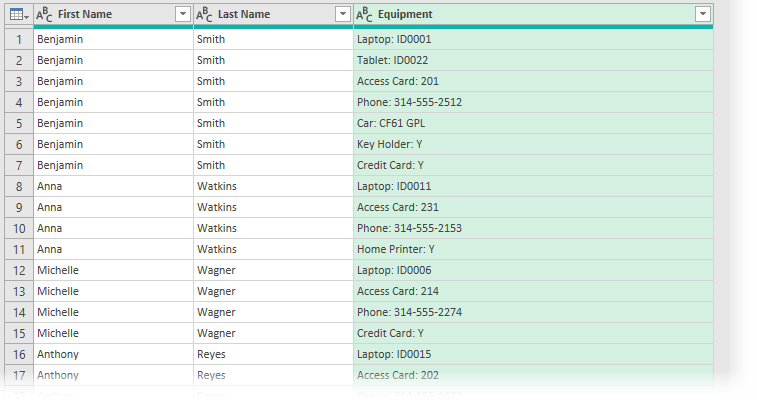
We’ve managed to split the data into individual rows. The individual’s name exists multiple times, as it is against each piece of allocated equipment. In many circumstances this will be all that’s required. However, for our scenario, we’ve got an extra step.
Split a column into columns
Now it’s time to separate the equipment from its attribute.
As before, click Home -> Split Column (drop-down) -> By Delimiter to open the Split Column by Delimiter dialog box.
Instead of splitting into rows, we can split into columns. Our delimiter is a colon ( : ), followed by a space.
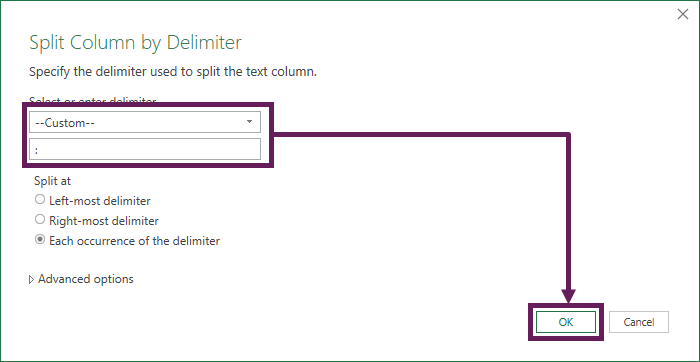
Click OK to split the Equipment column.
Rename the columns
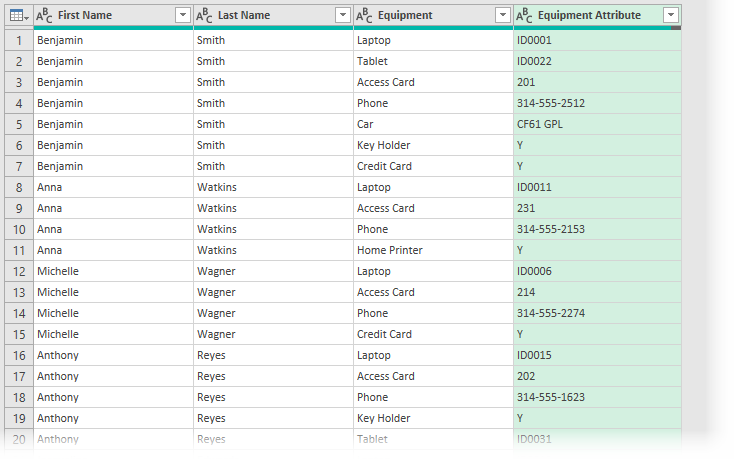
Finally, rename the columns, so they have useful names; double-click on each column header and enter the name for the column (I’ve gone with Equipment and Equipment Attribute).
The preview window now looks like this.
Load data into Excel
Everything is complete, so we are ready to push the table back into Excel. Click Home -> Close & Load (drop-down) -> Close and Load To…

The Power Query Editor will close, and the view returns to Excel. In the Import Data dialog box, select to load a table into the existing worksheet and select cell E1.
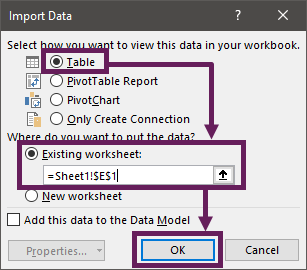
Click OK to close the Import Data dialog box.
The final data is now in Excel.

If there are any changes to the original data, we can simply right-click on the table and select Refresh from the menu.
Conclusion
Power Query is an amazing tool. Splitting cells just isn’t available using the regular Excel interface. We would have to use a macro, or some extraordinarily complex formulas. However, with Power Query, we can split delimited cells with just a few clicks.
Discover how you can automate your work with our Excel courses and tools.

Excel Academy
The complete program for saving time by automating Excel.

Excel Automation Secrets
Discover the 7-step framework for automating Excel.

Office Scripts: Automate Excel Everywhere
Start using Office Scripts and Power Automate to automate Excel in new ways.

Hi,
I can’t see split into rows option in advance. only split into column option visible
You may be on an older version of Excel. Which version are you using?
That was incredibly cool! I am definitely not a Visual Basic coder, so the discovery of Power Query was like a miracle. You did an excellent job of relaying a step-by-step process to successfully create rows from multiple data entries in a cell. My hero.
Thanks Jennifer – I’m glad I could help. I agree that Power Query is a miracle, I think it has replaced 75% of my VBA coding.
I have data that uses a semicolon as the delimiter.
I can split that into separate rows as described in this post, but, I need also to retain the original data and have the split of that data in the rows below it.
Struggling to achieve this! Any help greatly appreciated.
Thanks in advance.
I would try:
– Duplicate the column
– Find & replace on duplicated column to change “;” for something else, e.g. “|”
– Merge the two columns back together
– Split the merged column based on the “|”
That should get you pretty close.