When Office Scripts were released, there were only two ways to execute a script (1) through the script editor or (2) through Power Automate. Users screamed out for a better way. Microsoft delivered a clickable Office Scripts button that could be added to the face of a worksheet. However, the default button style is a bit ugly. So, wouldn’t it be great to have buttons that looked nice and provided a modern-looking interface?
That’s what we are doing in this post… making nicer-looking Office Script buttons that users will want to interact with.
Table of Contents
Watch the video
How to add an Office Scripts button
We can add a button to the worksheet for any script in our library.
- Select the cell in the worksheet where you want to place the button
- Navigate to the script we wish to use
- Select the 3 dots (more options) menu, then click Add Button.
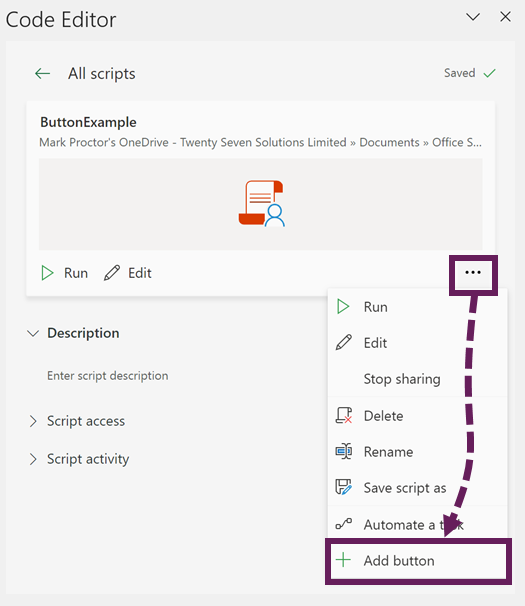
This works for Excel Online and Excel Desktop. A button similar to the following now appears in Excel.
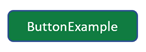
Clicking the button runs the script. Easy!
NOTES:
- Scripts requiring additional parameters fail if run from a button, as there is no way to pass the parameters to the script. Scripts with parameters can only be used with Power Automate.
- If a script is renamed, it remains connected to the button. It uses other identifiers to know which script to run. However, the flip-side of this is that we cannot easily re-point a button to another script.
- Tip: Renaming the buttons using the Name Box makes tracking and manipulating buttons easier.
Formatting the button
The default button style is a little bit ugly. However, since this button is a shape, we can edit it like any other shape.
Right-click the shape, and select Format Shape… from the menu
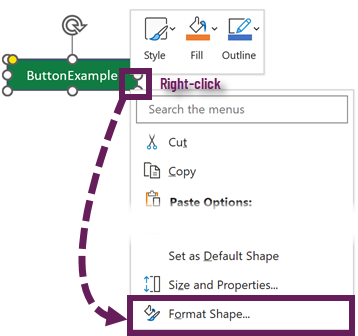
This reveals the Format Shape pane to apply different colors, gradients, shadows, bevels, glows, etc.
In the Home menu, we can change fonts, colors, and text sizes.
In the Shape Format contextual ribbon, there are more formatting options. We can even change the shape type, click Format Shape > Edit Shape > Change Shape, then select a suitable shape.

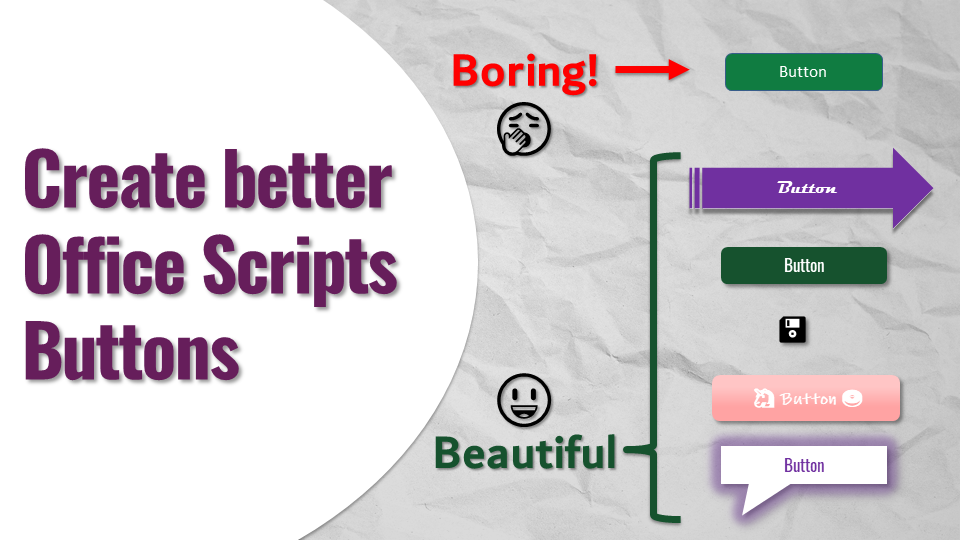
We have the power to create buttons that look how we want.
Here are a few ideas.

- Example 1: Solid fill, no line, shadow, and alternative font
- Example 2: Formatted to look like a VBA button
- Example 3: Emojis, gradient fill, and funky font add a bit of pizzazz
- Example 4: Shape changed to a speech bubble, and glow effect applied
- Example 5: Save icon used as a Picture Fill, then button line and text removed
These demonstrate how much freedom we have.
Format the button with a script
Using an Office Script, we can format buttons to look however we wish.
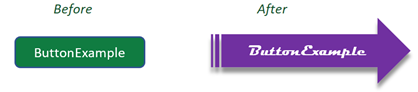
For example, start by renaming a default button to MyButton, then run the following script:
function main(workbook: ExcelScript.Workbook) {

  let shpName = "MyShape"
  let shp = workbook.getActiveWorksheet().getShape(shpName)

  shp.getFill().setSolidColor("#7030A0")
  shp.setHeight(50)
  shp.setWidth(150)
  shp.getTextFrame().getTextRange().getFont().setName("Magneto")
  shp.getLineFormat().setTransparency(1)
  shp.setGeometricShapeType(ExcelScript.GeometricShapeType.
    stripedRightArrow)

}
After running the script, the default button changes to a funky arrow style.
TIP: Try to build a library of scripts to apply your favorite button formats.
Using transparent images
What if we want something else that we can’t create using shapes? Then, let’s think about that slightly differently.
How about placing a transparent Office Scripts button over the top of the item? To the user, it appears they are clicking the item, but they are actually clicking a transparent button.
In the example below, Cell B2 contains the IMAGE function, which returns the Excel Off The Grid logo.
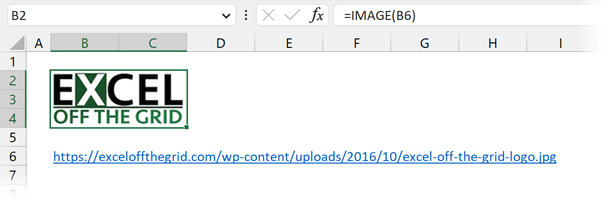
We can’t run a script from the IMAGE function, but if we place a transparent button over the top and remove the text and line, it creates a clickable area, which to the user, appears as if they are clicking the logo.
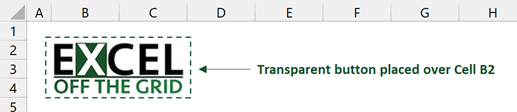
NOTE: For this technique to work, we cannot set the button to No Fill; that removes the clickable area. Making the button 100% transparent achieves the effect we need.
Conclusion
We don’t need to settle for the ugly default Office Scripts button. Instead, get creative and build an interface that users will want to interact with.
Related Posts:
- How to run Power Automate from Excel with Office Scripts or VBA
- Use Office Scripts with Power Automate
- Power Automate CSV to Excel (via Office Script: Easy Method)
Discover how you can automate your work with our Excel courses and tools.
The Excel Academy

Make working late a thing of the past.
The Excel Academy is Excel training for professionals who want to save time.