
Over the last few months, I’ve been asked several times how to add a fiscal month, fiscal quarter, or fiscal year column in Power Query. So, I decided to note down the method; therefore, I don’t have to keep reminding myself how I did it last time. The good news is that it’s reasonably straightforward. Let’s see what we need to do.
Table of Contents
Download the example file: Join the free Insiders Program and gain access to the example file used for this post.
File name: 0154 Fiscal Month, Year, Quarter in Power Query.xlsx
Watch the video

Data
For this example, I’m starting with a simple data set.
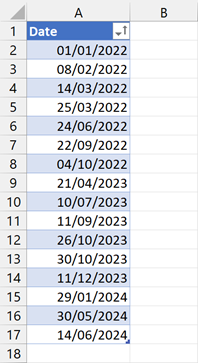
All of these dates are in the dd/mm/yyyy format. Depending on your regional setting, they may be in another date format.
Throughout this post, I’m assuming:
- We are using a standard calendar for month ends. I’ll cover non-standard calendars in a future post.
- The year-end is March (i.e., Period 3)
Add a fiscal month column
There are several ways to calculate the fiscal month; I’m going to demonstrate the easiest to understand.
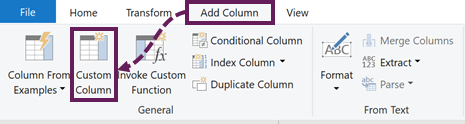
In Power Query, click Add Column > Custom Column.
In the Custom Column dialog box, enter the following formula:
=if Date.Month([Date]) <= 3 then Date.Month([Date]) + 9 else Date.Month([Date]) - 3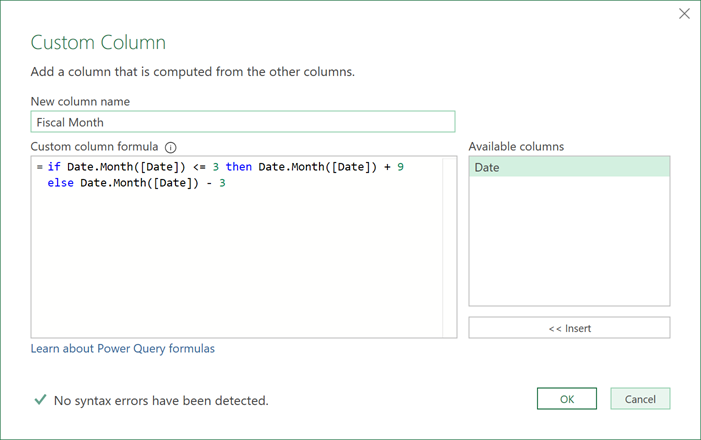
- Date.Month([Date]) – Returns the calendar month number from the date
- 3 – the year-end month
- 9 – 12 months in a year, minus the year-end month
The additional column looks like this:
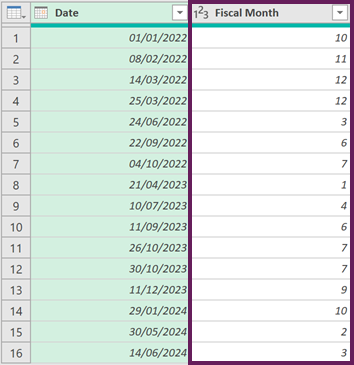
If you already have a calendar month column in your source data, you can replace Date.Month([Date]) with that column name.
Bonus tip: If you want to declare the data type in the same step, add Int64.Type as the data type into the formula bar (see underlined below)
= Table.AddColumn(#"Changed Type", "Fiscal Month", each if Date.Month([Date]) <= 3 then Date.Month([Date]) + 9 else Date.Month([Date]) - 3, Int64.Type)Add a fiscal year column
To add a fiscal year column, the process is the same, but a slightly different formula.
In the Custom Column dialog box, enter the following formula:
=if Date.Month([Date]) <= 3 then Date.Year([Date]) else
Date.Year([Date]) + 1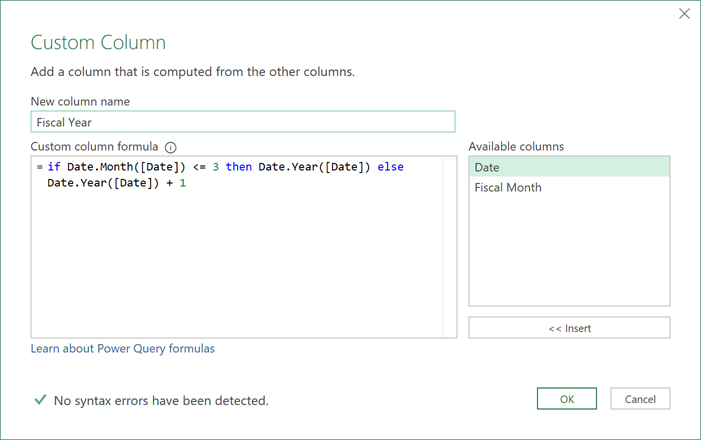
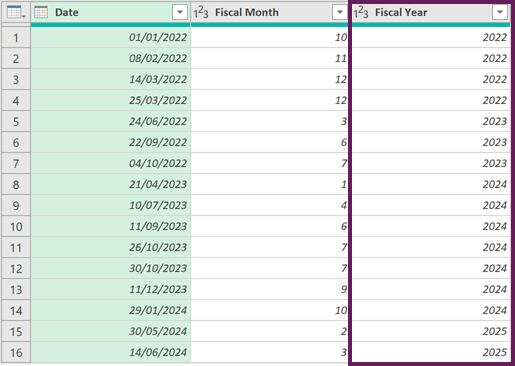
Again, if you already have a calendar month column in your data, use that instead of Date.Month([Date]).
The additional column looks like this:
Add a fiscal quarter column
The fiscal quarter may seem a little trickier initially, but this method is super easy.
In the Custom Column dialog box, enter the following formula:
=Number.RoundUp([#"Fiscal Month"]/3)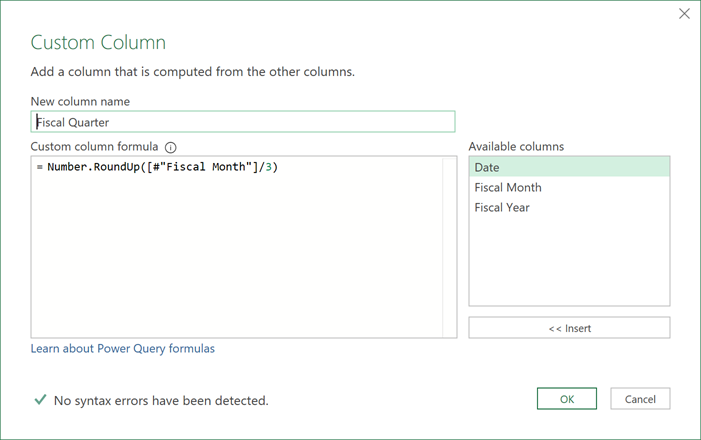
- #”Fiscal Month” – the name of your fiscal month column calculated earlier.
The additional column looks like this:
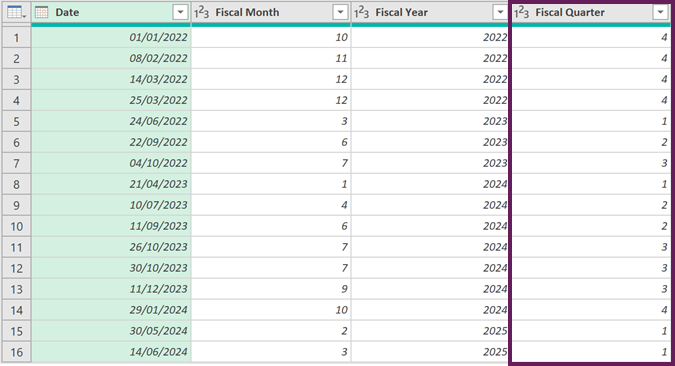
If we don’t have a Fiscal Month column in our data, we can incorporate everything into a single transformation.
=Number.RoundUp(
(if Date.Month([Date]) <= 3 then Date.Month([Date]) + 9 else Date.Month([Date]) - 3)
/3)
Want to add half years (e.g., H1, H2) instead of quarters? No problem. Change /3 to /6.
Conclusion
We’ve seen that adding fiscal month, fiscal quarter, and fiscal year columns in Power Query is reasonably straightforward. It just takes a little bit of logic inside a custom column.
Related Posts:
- Power Query date format (How to + 5 tricky scenarios)
- How to subtract dates in Excel to get days
- Power Query If statement: nested ifs & multiple conditions
Discover how you can automate your work with our Excel courses and tools.
The Excel Academy

Make working late a thing of the past.
The Excel Academy is Excel training for professionals who want to save time.
That’s awesome! You made it look so easy.
Thank you for the awesome solution!
You’re welcome.