We come across drop-down lists on the internet and other software applications all the time. They are useful because they limit the options available to the user, as only pre-validated items can be selected. In this post, we’ll look at how to add a drop-down list in Excel.
In Excel, there are three different types of worksheet-based drop-down lists:
- Data validation
- Form control
- ActiveX
So how do you know which one you should use? As with so many things, the answer is “it depends”. Let’s take a look at these three options and understand where to use each one.
Table of Contents
Download the example file: Join the free Insiders Program and gain access to the example file used for this post.
File name: 0028 Drop down lists in Excel.xlsx
Data validation drop-down list
The most common form of drop-down list is a data validation list. Let’s create one of these.
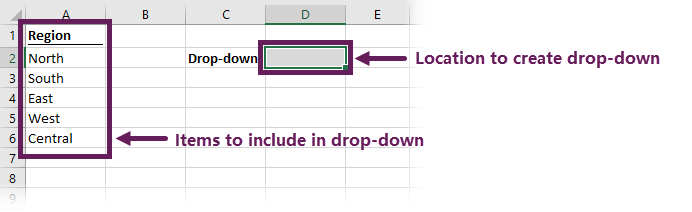
Enter the values to be used in the drop-down list into a range of cells; these are known as the ‘list items’.
Then select the cell in which the drop-down should exist.
Click Data > Data Validation (drop down) > Data Validation…

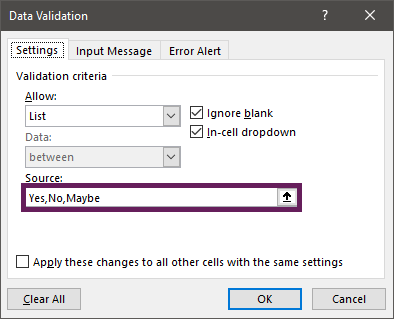
The data validation dialog box opens. On the Settings tab, select list from the allow box, and enter the range of cells containing the list in the source box.

Click OK to close the data validation dialog box.
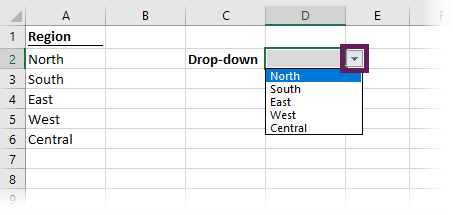
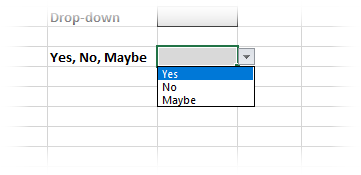
To use the drop-down, click on the cell containing the data validation list. We can now only select a value from the list.
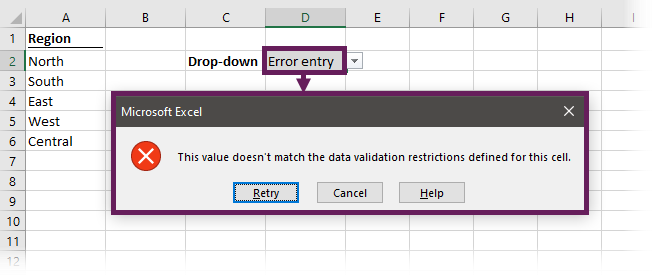
Typing an invalid entry in the cell will result in an error message.
Other data validation list options
There is lots of flexibility in this type of drop-down list.
List input as hardcoded values
The list doesn’t have to be on a worksheet; the values can be hardcoded into the source field. The screenshot below shows how to include the options Yes, No and Maybe without using cells; each list item is separated by a comma
A drop-down list created in this way would look like this:
TOP TIP: If we need to use a comma in the list item text, press ALT+0130 to enter the comma, instead of a regular comma character.
List input as rows or columns
If using values in worksheet cells as the source, the list of values can be arranged in rows or columns (but not both at the same time)
List input as a named range
The list of values can be stored in a named range, provided it is a continuous range of rows or columns.
TOP TIP: If you can’t remember the name of the named range, press F3 and select from the Paste Name dialog box.
List input as a Table
I love Tables, but they don’t work as well with data validation lists as they should. Check out this post to find out how to make it work.
List input as dynamic arrays
If you have a dynamic array enabled version of Excel (only Microsoft 365 and Excel 2021), then data validation lists can contain the result of a dynamic array.
If the first cell in the output array were in cell A2, we could use =A2# as the reference in the source box. This method is excellent for advanced techniques, such as shrinking lists, or dependant lists.
Input messages
The Input Message tab of the data validation dialog box provides the settings to display a message when a user clicks the data validation cell.
The message is intended to provide guidance for the user so they know what type of information to enter.
We only need to provide a title and an input message.
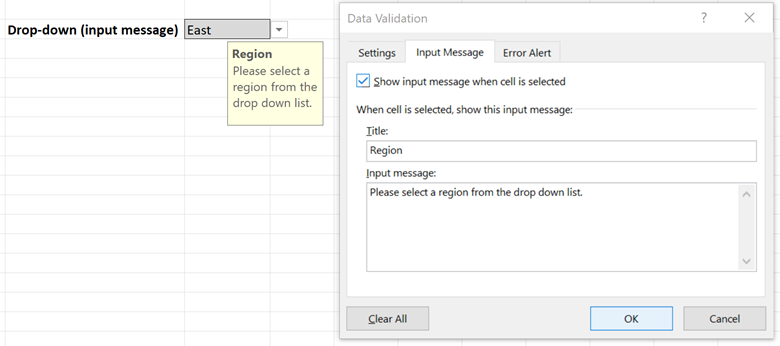
Make sure show input message when cell is selected is checked; otherwise, the message will not appear.
Error alerts
The purpose of a drop-down list of to select valid entries from a list. As a result, the chance of invalid data entry is significantly reduced. However, users can still enter text directly into the cell; therefore, invalid data entry is still possible.
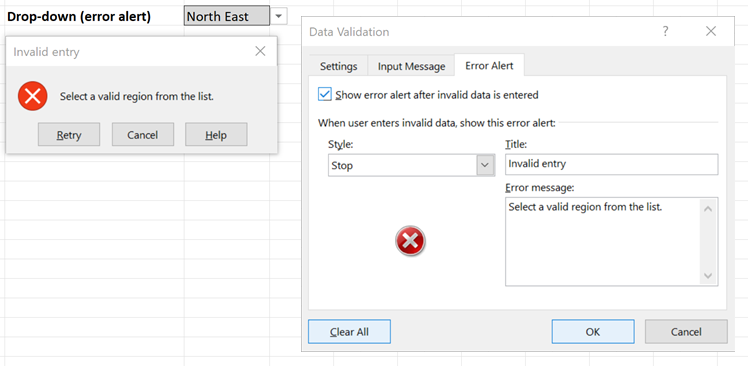
The default message doesn’t provide any guidance regarding why the entry is invalid. But we can provide custom messages inside the Error Alert tab.
To provide a custom message, we only need to provide a title, an error message, and select a style icon.
Make sure show error alert after invalid data is entered is checked; otherwise, no error message will appear; a user could enter any value.
Useful notes
Before we move on, I want to make you aware of a few issues with data validation drop-down lists in Excel:
Identifying the cells containing data validation
The drop-down arrow is only visible when a user clicks on the cell. Therefore, here is no visual indicator that a cell contains a drop-down list exists until it is selected. Formatting the cell may be useful to provide a better user experience.
Copy and Paste dangers
When we copy and paste cells containing the data validation to other cells, the drop-down list is transferred as part of the format. This is great if we want to create a lot of drop-down lists containing the same items.
However… now for the danger part…
A user can copy and paste values into a cell, even if those values are not in the data validation list. If a user types into a cell, the data validation process runs; if a user pastes values into a cell, the validation is not triggered at all. This is a big problem
Here is another quirk…
If the worksheet is protected, the copy and paste overwrites the value, but retains the drop-down list. However, if the sheet is not protected, copy and paste applies the format from the source cell. As a result, the data validation drop-down list can disappear completely.
Highlight all cells with invalid options
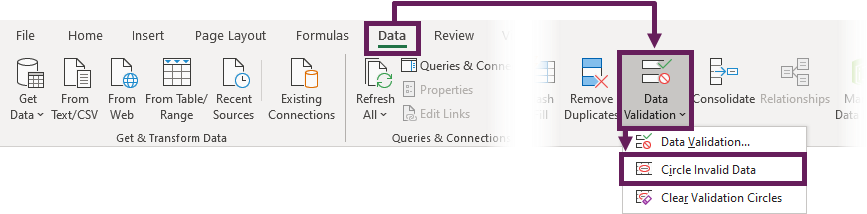
Excel can perform a check to identify any cells containing values that do not meet the data validation criteria. Click Data > Data Validation (drop-down) > Circle Invalid Data
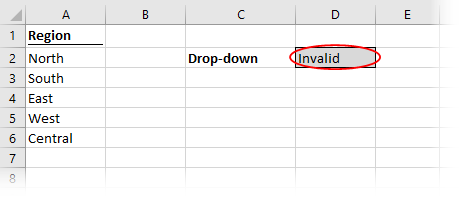
This will highlight the cells as follows:
To remove the circles, click Data > Data Validation (drop-down) > Clear Validation Circles.
Form control drop-down list
Form controls can be used as another type of drop-down list in Excel. While they remove some of the negatives from data validation drop-downs, they come with their own unique challenges. VBA can be used to control form control elements; however in this post, we’ll be keeping things simple and looking at the basic non-VBA functionality (which is still pretty powerful).
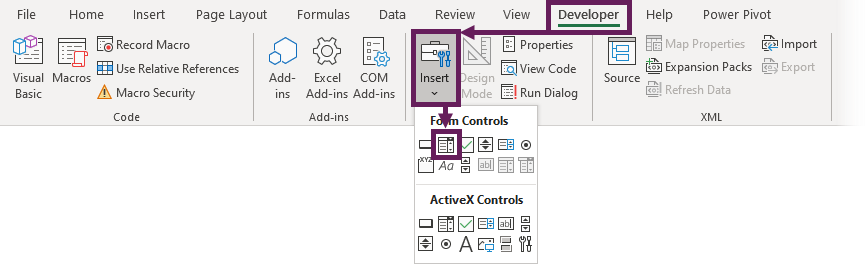
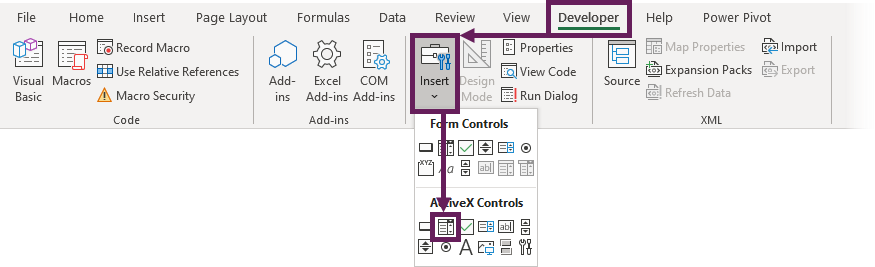
Let’s start by creating a form control drop-down list. These are contained within the Developer ribbon.
Click Developer > Insert > Combo Box (Form Control)
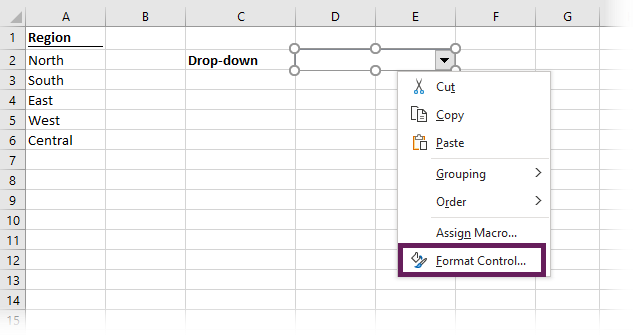
The mouse pointer will change to a cross. Click and hold the mouse while you draw the location to place the drop-down list. Holding the ALT key while placing the object will also snap the drop-down to the grid.
Right-click on the drop-down list and select format control…
The format object window will open. Click on the control tab. The key fields are:
- Input range – the range of cells to include in the drop-down list.
- Cell link – the cell in which to output the value.
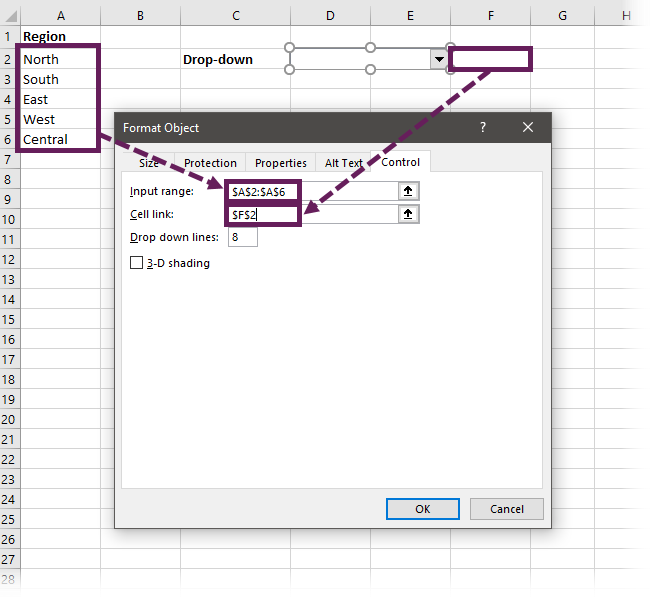
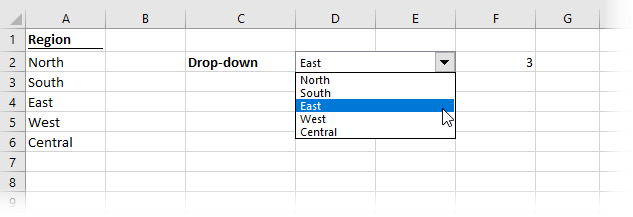
The cell selected for the cell link shows the chosen position in the drop-down box. As East is the third item in the list, cell F2 displays 3.
The biggest issue with the form control drop-down is that the cell link shows the position in the drop-down rather than the value itself. By using the INDEX function and the input range cells, we can retrieve the value from the list.
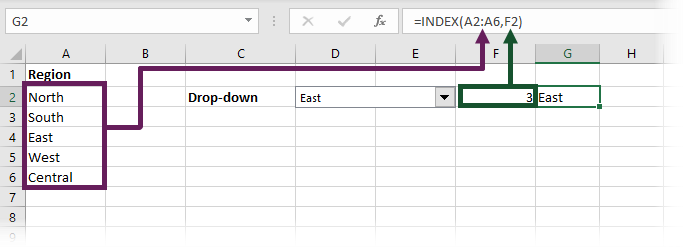
The formula in cell G2 is:
=INDEX(A2:A6,F2)
Input range options
With Form Control drop-down lists, the input range can be a standard cell range or a named range. Hardcoded lists and dynamic arrays are not compatible. However, we can use a dynamic array placed inside a named range as a workaround.
Useful notes
If we wish to have lots of drop-down lists, we can copy and paste a form control object. However, we must go into each drop-down individually to repoint to a new cell link.
We cannot enter text into the drop-down list; therefore, it is not possible to select an invalid entry.
Form controls are not compatible with Excel Online.
ActiveX drop-down list
Now for the final type of drop-down list in Excel; ActiveX drop-down list.
Click Developer > Insert > Combo Box (ActiveX Control)
Just like the form control option shown above, draw the drop-down box on the worksheet.
Right-click on the drop-down and select properties from the menu.
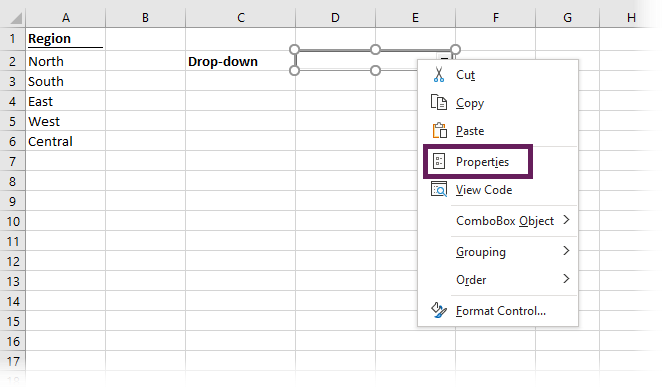
The properties dialog box opens. The critical parameters for our purposes are LinkedCell and ListFillRange. These are similar to the form control drop-down list; enter equivalent ranges into these fields. Click on the [x] in the top right corner to close the Properties window.

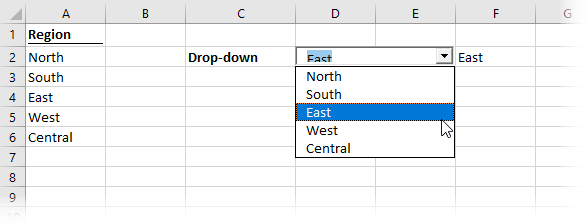
Clicking Developer > Design Mode toggles between using and editing the drop-down list. When in design mode, the drop-down can be edited, but not used. Vice versa, when in display mode, the drop-down can be used, but not edited.

Unlike the form control version, the ActiveX drop-down displays the selected value directly in the linked cell.
ActiveX has more extensive formatting options than form controls.
Useful notes
ActiveX drop-down boxes have many features to be aware of:
- When in design mode, the ActiveX drop-down can be copied or deleted, but not when in display mode.
- ActiveX doesn’t work on a Mac or Excel Online. So, if you want a genuinely cross-platform workbook, this is not the option for you.
Which option to choose?
So, which option should you choose for a drop-down list in Excel? As I said in the introduction, it depends. My general advice is:
- Avoid ActiveX, if possible.
- Use Form Controls for single-cell selections where strict input is required.
- Use Data Validation, where a drop-down may need to be copied.
That’s just a basic rule I use. In all cases, suitable worksheet protection needs to be applied to prevent accidental changes. Ultimately, you’ll need to experiment with all the options and work out what is best for your circumstances.
Discover how you can automate your work with our Excel courses and tools.
The Excel Academy

Make working late a thing of the past.
The Excel Academy is Excel training for professionals who want to save time.