
A few weeks ago, I wrote a post about linking Excel files into PowerPoint. Whilst PowerPoint is probably the application I use most (after Excel of course), in third place would be Word. If, like me, you are regularly creating Word documents, or using standard templates, then learning how to link Excel to Word can save a lot of time.
Whilst the basic process is the same as PowerPoint, the method of implementation is a little different.
Link Excel to Word
The process of linking an Excel workbook to a Word document is straightforward. Simply copy a range from Excel. Then, in Word click Home -> Paste (small arrow). There are various options, as default we can click the icons for Paste Link and keep formatting or Paste Link and merge formatting.
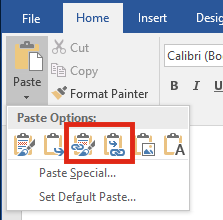
But, if we click Paste Special… it provides even more options. Click Paste link and then select the paste type. Finally, click OK to paste the Excel content into the Word document with your selected options.
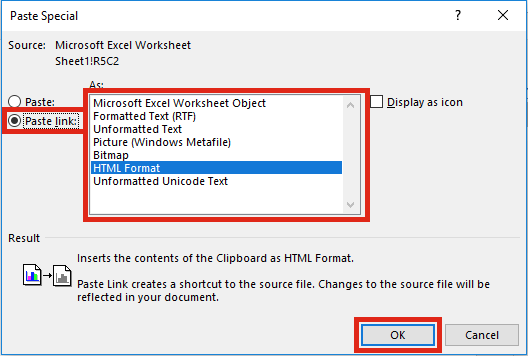
Notice the number of paste options available to you. I especially like Unformatted Text, as it can be used to add variable information to a standard sentence.
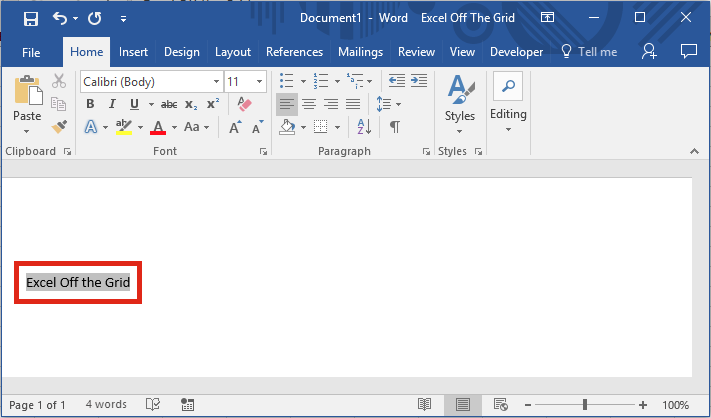
Within Word, when selected, any linked text will highlight grey (unless the settings in Word have been changed). See the screenshot below.
Field Codes
One of the key differences to PowerPoint is the existence of Field Codes. This is the method by which Word inserts linked documents and other dynamic options.
You can view the code behind the Field Code by pressing Ctrl+F9 to view all Field Codes, or Shift+F9 to display just the selected Field Code. The screenshot below shows an example of a Field Code.
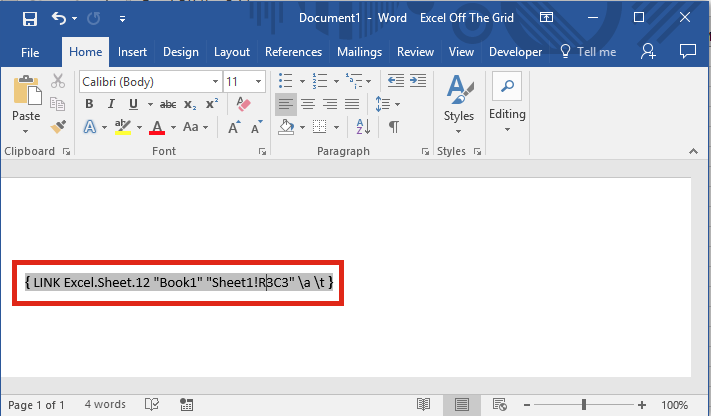
It is possible to manually edit the text in the Field Code. Along with changing the file path and cell address, it is also possible to change the “switches”. The switches are the pieces of text at the end which all have “\” followed by a letter or letters. The main ones are:
| \a | update link automatically (manual updating if switch not used) |
| \t | show the linked item as text |
| \p | show the linked item as a picture |
A lot more can be achieved through Field Codes, but that is really outside the scope of this post.
Update and edit links
The benefit of linking documents is that once created, you can update the linked values quickly.
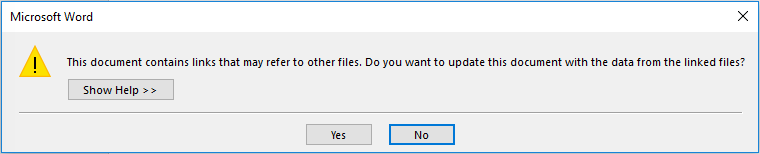
Update link on opening
When opening the Word document you will have the option to update the document with data from the linked files.
Updating on demand
If you just want to update a single link you can right-click the link then select Update Link from the menu.
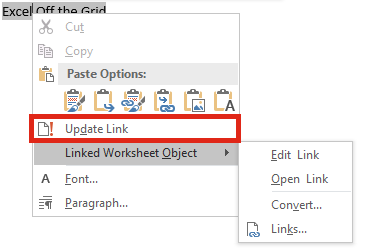
Through the Linked Worksheet Object submenu (as shown above) there are further options to Edit, Open and Convert Links.
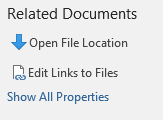
Update with the “edit links” option
This option is available through the Linked Worksheet Object menu as shown above, or through the ribbon File -> Info -> Edit Links to Files (it’s in the bottom right corner, but only once the Word document has been saved).
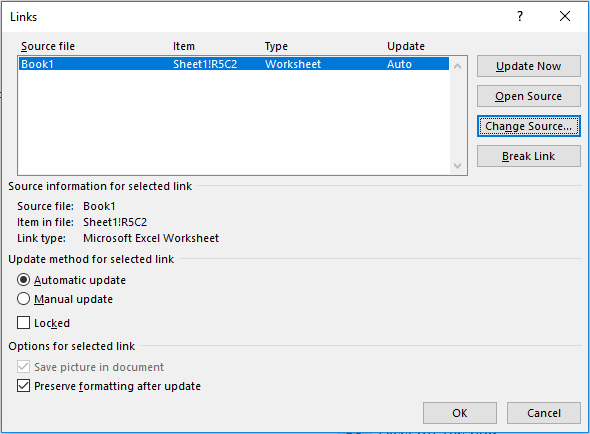
The Links window will open, which provides various options to update, edit and break links.
Top Tips to link Excel to Word
If you link Excel to Word often, you will soon find it doesn’t always behave how you might expect. Here are my top tips to get the best results:
- Use named ranges – adding rows and columns in a worksheet will not change the link reference in Word. For example, if Word is linked to Cell A1, then you insert a new column at the start, Cell A1 will become Cell B1. But, Word still references Cell A1. This would now be the wrong cell. A named range helps to ensure the correct range is displayed in the document.
- Word will not know if you change the name or file path of a linked file (see point 3 below for the exception). You need to ensure the most up-to-date version of the Excel file always has the same file name and file path, so that Word can find it.
- The fastest method of changing the source of an Excel file is to have both the Excel and linked Word files open. Then save the Excel file with a new path or file name. In this circumstance, Word will update the reference to the file automatically.
Related posts:
Discover how you can automate your work with our Excel courses and tools.
The Excel Academy

Make working late a thing of the past.
The Excel Academy is Excel training for professionals who want to save time.
Well written. I like the Top tips. Do you have a similar article about the other way : linking Word files to Excel.
Thanks, I’m glad you liked the post.
I’ve never tried linked Word files to Excel. It sounds like an interesting project.
this work great
I made an edit in excl
showed the edits asap = nice!
BUT – I need to send the word file to my partner
1. how will the link work then (as the word is on MY laptop)
2, can I put the word in the cloud? One drive?
3. or other suggestions?
Your partner can still open the word document, but won’t be able to refresh the links, as the links will be on your PC. I recommend trial and error and seeing what happens… that’s what I would do. OneDrive is interesting, it can certainly cause some unexpected problems.
Why does the field in word has double coordinates for the cell? For example, R5C2 in your image?
It uses the R1C1 Referencing style.
R5C2 would be Row 5, Column 2. This is equivalent to cell E5 in the A1 referencing style we normally use.
Hi, My excel file is completely blank, it is not showing me anything. Tried everything even this software. It is completely blank.
Please help.
There is a lot of work, it is happening with 4 of my files, after associating it with my word document.
These are standard features of Microsoft Office. So if you’ve got issues I suspect it’s either a bug or user error. Try googling other tutorials to see if they make more sense to you.
I try this way with linking named range to word, but I have few problems with it. May be somebody can help with it.
1.I have a pretty big table, so use “repeat as header at the top of each page”, but the repeating row is breake after updating the data.
2. Also I insert xls table into word, change the formating. Sometimes it is needed to add few rows in excel to named range(for example: it was A1:C20 and become A1:C40). The previous row are ok with formating, but the new rows have default format.
Hi, I faced the same problem, did you find the answer to your question? Thanks
Read other articles that assumed I knew more than I did. The read this one and was able to do what I needed.
Thanks!
You mentioned the following at the end of your article:
“The fastest method of changing the source of an Excel file is to have both the Excel and linked Word files open. Then save the Excel file with a new path or file name. In this circumstance, Word will update the reference to the file automatically.”
Does this functionality exist in newer versions of Excel and Word? (E.g, 2019 or 365)
It should do. I’m not aware of it changing.