SharePoint is becoming a common data source for many organizations. With the increase of users on Microsoft 365 licenses, I think we can assume this will continue to grow. Teams, OneDrive, and Lists are all built on the SharePoint platform; therefore, it is easy to interact with SharePoint without knowing it. Given this increase, I thought we should look at how to get data from a SharePoint List using Power Query.
Table of Contents
Note: In this post, we are looking at using SharePoint online. We are not looking at on-premise installations, but many principles will be the same.
Watch the video
Getting the SharePoint site URL
The first part of connecting to a SharePoint List is finding the URL. Unfortunately, it’s not as simple as just copying the URL from the address bar.
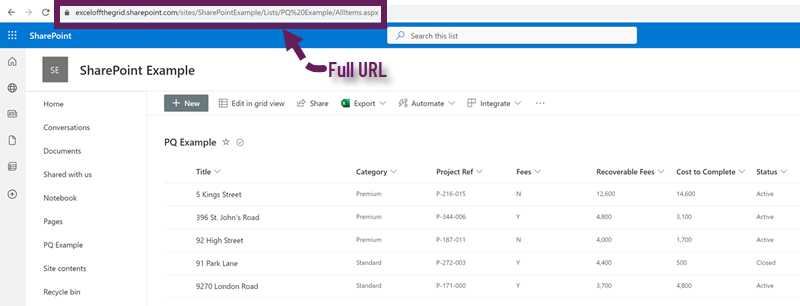
In the image above, I have a SharePoint list. The URL is:
https://exceloffthegrid.sharepoint.com/sites/SharePointExample/Lists/PQ%20Example/AllItems.aspxHowever, we don’t want the full URL of the list. We just need the URL of the site. This includes up to and including the text after the word sites/.
https://exceloffthegrid.sharepoint.com/sites/SharePointExample/Lists/PQ%20Example/AllItems.aspxCopy this part of the text.
Get the SharePoint list into Power Query
Now let’s head over to Excel.
There are two SharePoint List connectors, SharePoint List and SharePoint Online List. The differences between the two connectors will become clear in the next section.
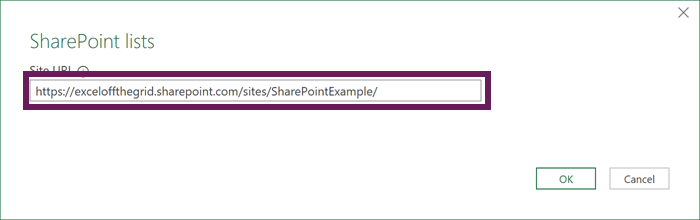
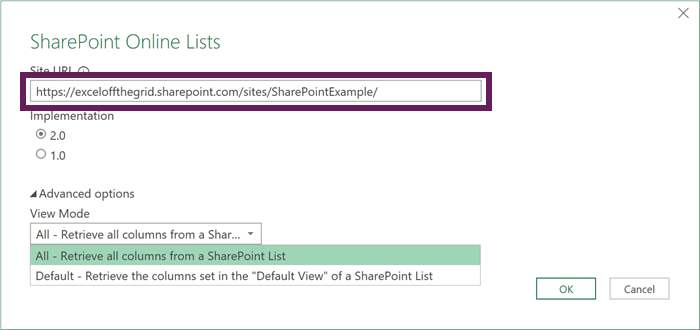
For now, pick one; enter the site URL from above, then click OK.
SharePoint List
Connects to SharePoint On-Premise and Online.
Click Data > Get Data > From Other Sources > SharePoint List
SharePoint Online List
Connects to SharePoint Online only.
Click Data > Get Data > From Online Services > SharePoint Online List
Selecting Implementation 2.0 enables us to retrieve all the columns from the list, or only those in the default view.
The Navigator window opens all the elements related to the SharePoint site. Select the site to load into Power Query, then click Transform Data.
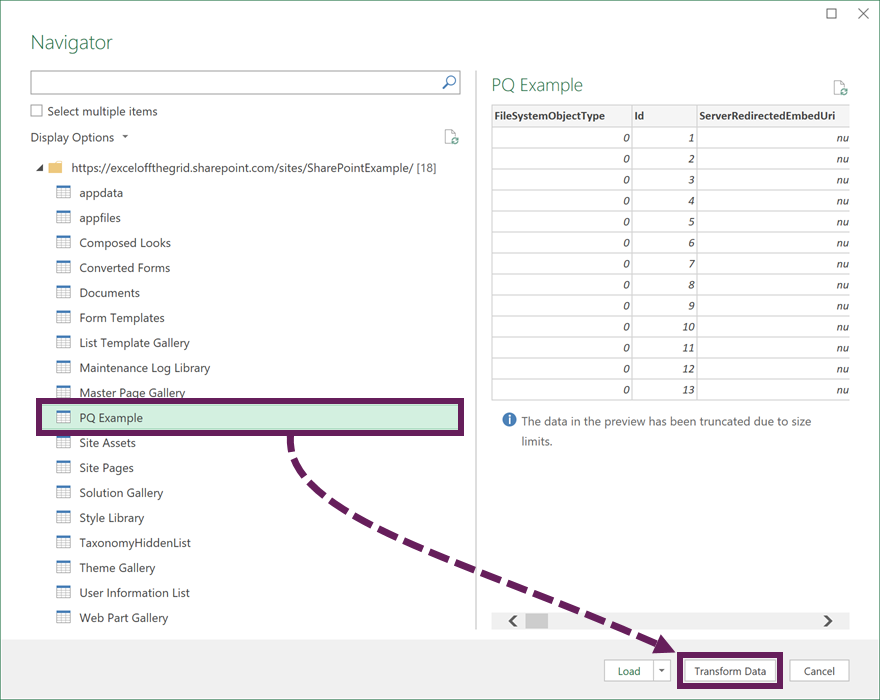
Power Query displays the list in the Preview Window.
What data is available?
Depending on the connector selected, we see different data views:
SharePoint Online List
If you selected SharePoint Online List, you see different columns depending on the View Mode option chosen in the connector.
- Default: Only the data in the default view, plus an ID column
- All: All the data in the List, plus additional fields for the creator, modifier, attachments, version numbers, etc.
We can switch between views by editing the M code of the Source step. In the ViewMode parameter, enter the text “All” or “Default”, as shown in the example below.
= SharePoint.Tables("https://exceloffthegrid.sharepoint.com/sites/SharePointExample/", [Implementation="2.0", ViewMode="All"])SharePoint List
If we selected the SharePoint List, there might be more columns than you were expecting.
These additional columns give us access to the metadata about each record. For example, selecting a value in the Editor field displays the details about the last person to change the value (that might be useful at some point).
We can simply select the fields we wish to keep and click Home > Remove Columns > Remove Other Columns.
The M code in the Source step for this connector is as follows. Therefore, if we wanted, we could switch to the SharePoint Online List by changing the query parameters to those shown in the SharePoint Online List section above.
= SharePoint.Tables("https://exceloffthegrid.sharepoint.com/sites/SharePointExample/", [ApiVersion = 15])Loading the data
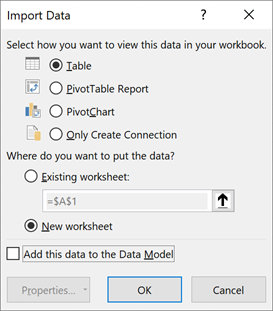
In Power Query, Click Home > Close & Load To…
This leads to the Import Data dialog window. From here, you can decide where to put the data.
Loading into an Excel Table? Do we need Power Query?
If we are loading the data into an Excel Table without any other transformations, an alternative is a .iqy file.
In SharePoint, click Export > Export to Excel.

This downloads a file called query.iqy. Double-click the file to open it in Excel; this creates a workbook containing a Table with a live connection back to the SharePoint list.
To refresh the Table, click Data > Refresh.
However, if you need to do anything else with the data, then Power Query is the best option.
Conclusion
With the increased usage of SharePoint (including Teams, OneDrive, and Lists), it is becoming a more common source for data storage. In this post, we’ve seen how to easily connect to this data and load it into Excel using Power Query.
Related Posts:
- Get data from OneDrive or SharePoint with Power Query
- Get data from OneDrive Personal files with Power Query
- How to get data into Power Query – 5 common data sources
Discover how you can automate your work with our Excel courses and tools.
The Excel Academy

Make working late a thing of the past.
The Excel Academy is Excel training for professionals who want to save time.